Table of Contents
Imagine this: you’ve built an application that you want to deploy on Google Cloud (GCP), and it needs to interact with other GCP services like Cloud Storage or Cloud Functions.
Now, how can you ensure that your application has the necessary permissions to access these services securely? This is where service accounts come into play.
In this post, we’ll learn about authentication in Google Cloud, and how to use service accounts to control application access within your GCP environment.
What Are Service Accounts? And Why Are They so Special?
Normally, whenever you (or other humans) interact with Google Cloud services on the console or through the command line, you use your Google account for authentication.
But what about applications running on GCP that need to access these services programmatically? For example, a web application that needs to store user-uploaded files in Cloud Storage or a data processing pipeline that reads from BigQuery.
In this example, the web application itself needs to authenticate and access GCP services, not a human user. This is where service accounts come in.
Think of service accounts as specialized accounts designed for your applications rather than individual users. Unlike your personal Google account, service accounts are used by applications to interact with GCP services.
They act as the identity of your application, allowing it to authenticate and gain authorized access to the resources it needs.
Creating and Using a Service Account
Service accounts are created and managed within the Google Cloud Console. When you create a service account, you can assign specific roles to it, granting the necessary permissions to access GCP services.
After this, you can associate the service account with your application (we’ll talk about how to do this in the next sections). This will allow it to authenticate and interact with GCP services on behalf of the service account.
Let’s walk through a practical example of creating and using a service account to access Cloud Storage. In this example, we’ll create two service accounts: one with access to Cloud Storage and another without access.
We’ll then use these service accounts to interact with a Cloud Storage bucket from two different VM instances.
- Create a Service Account: In the Google Cloud Console, navigate to the IAM & Admin section and create a new service account.
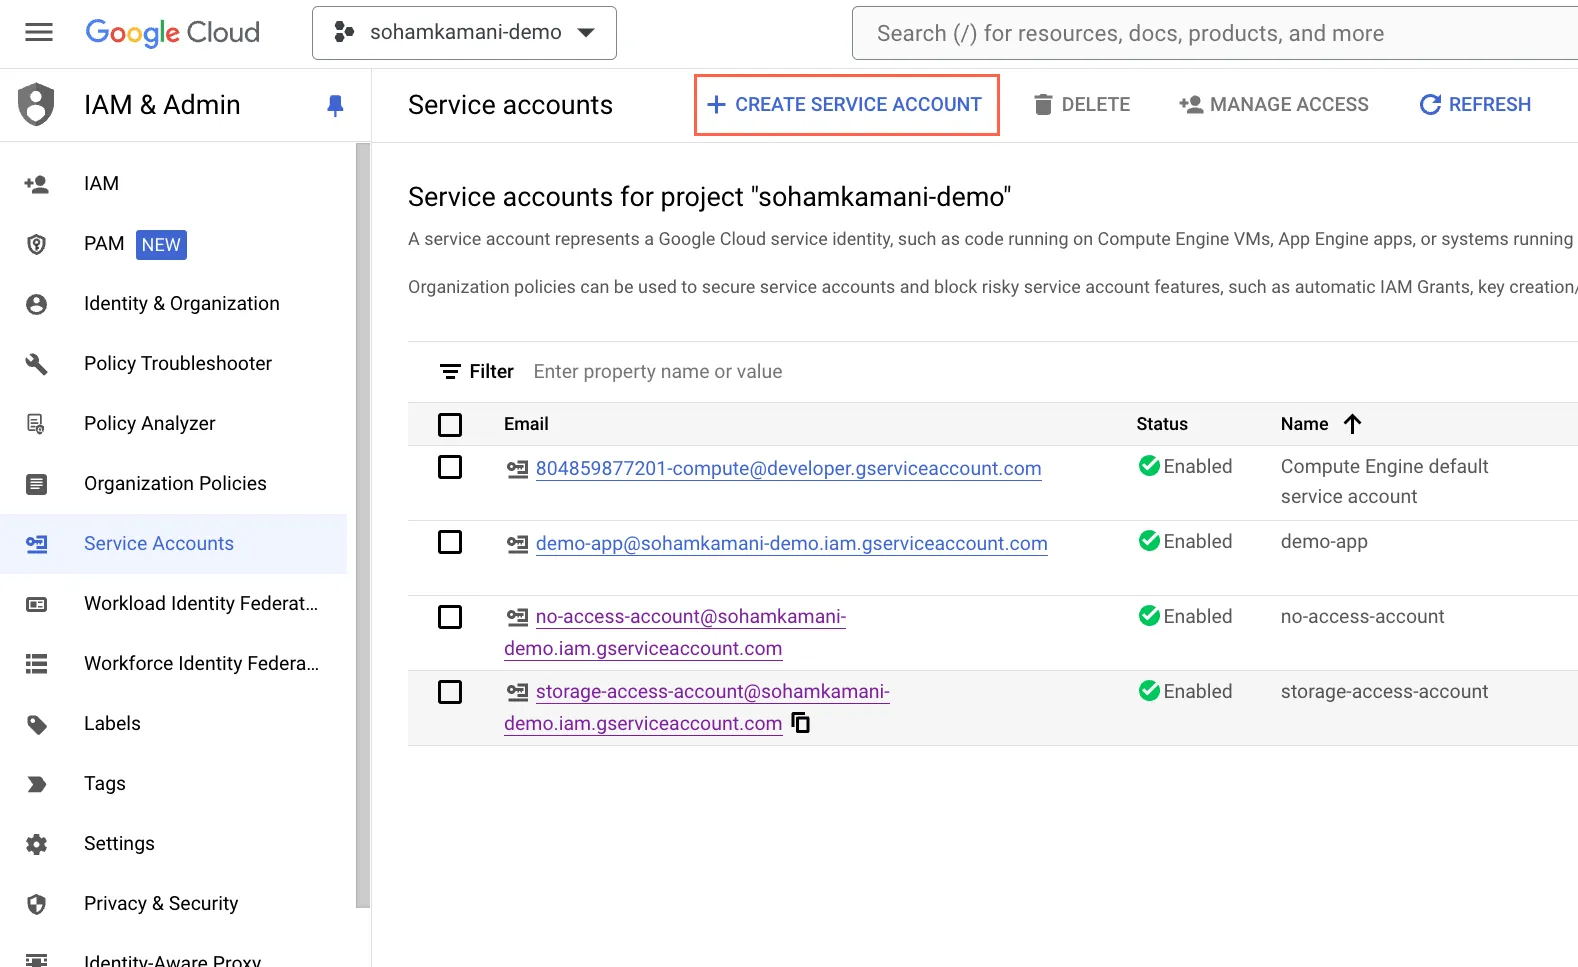
- Give it a descriptive name and description. In this case, let’s call it
storage-access-account. We’ll also create another service account calledno-access-accountthat will not have access to Cloud Storage. - Assign Roles: Grant the necessary roles to your service account. For our Cloud Storage example, assign the “Storage Object Creator” and “Storage Object Viewer” roles to the
storage-access-accountservice account. For theno-access-accountservice account, we won’t assign any roles related to Cloud Storage.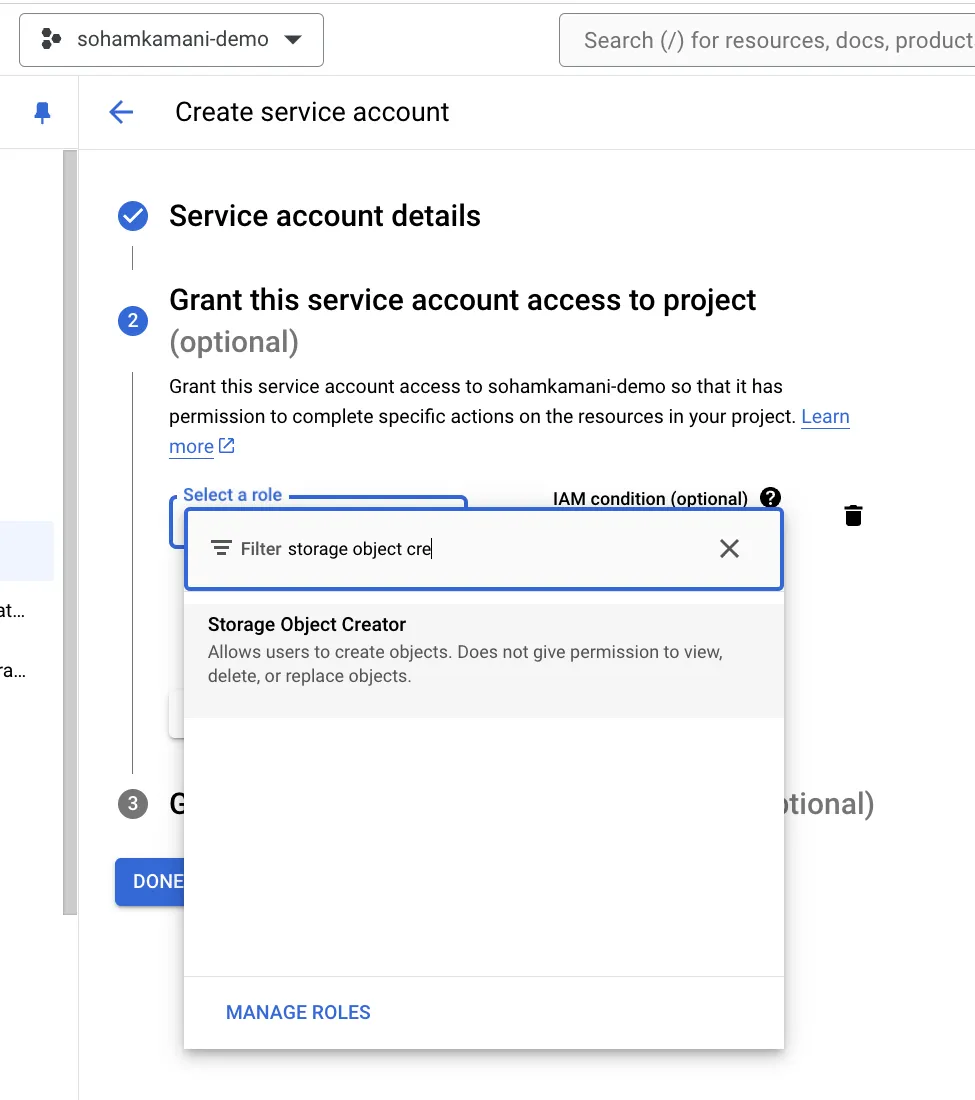
- Create a VM Instance: Create a new VM instance in the Compute Engine portal.
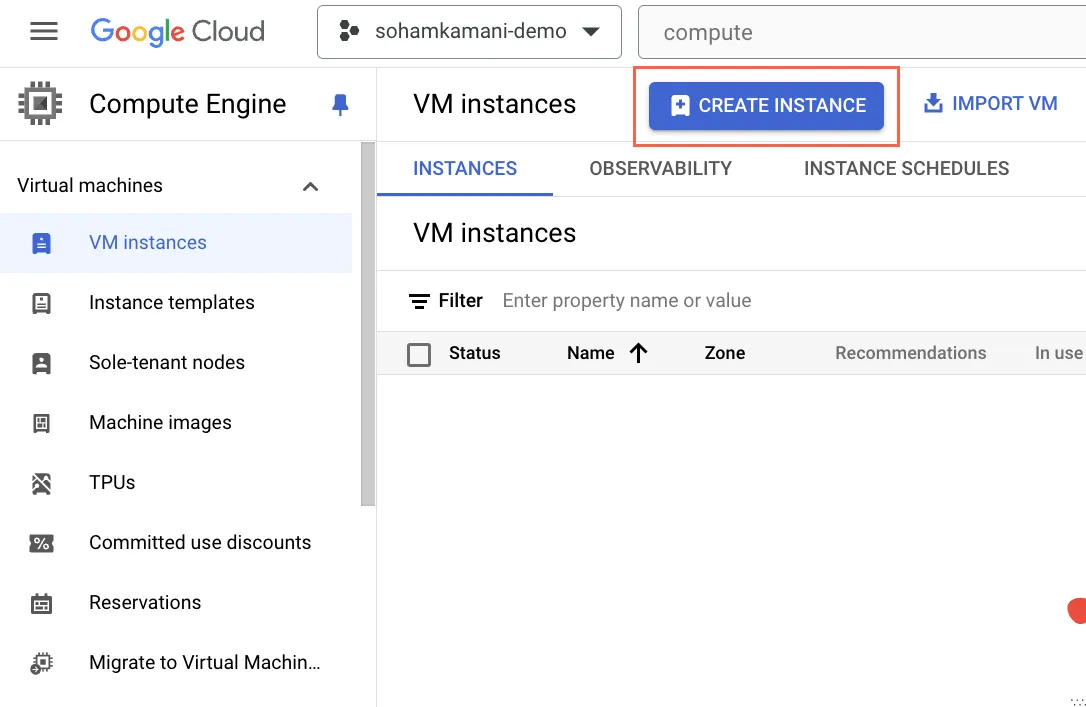 During the creation process, select the
 storage-access-accountservice account as the default service account for the VM. We will also create another VM instance with theno-access-accountservice account attached.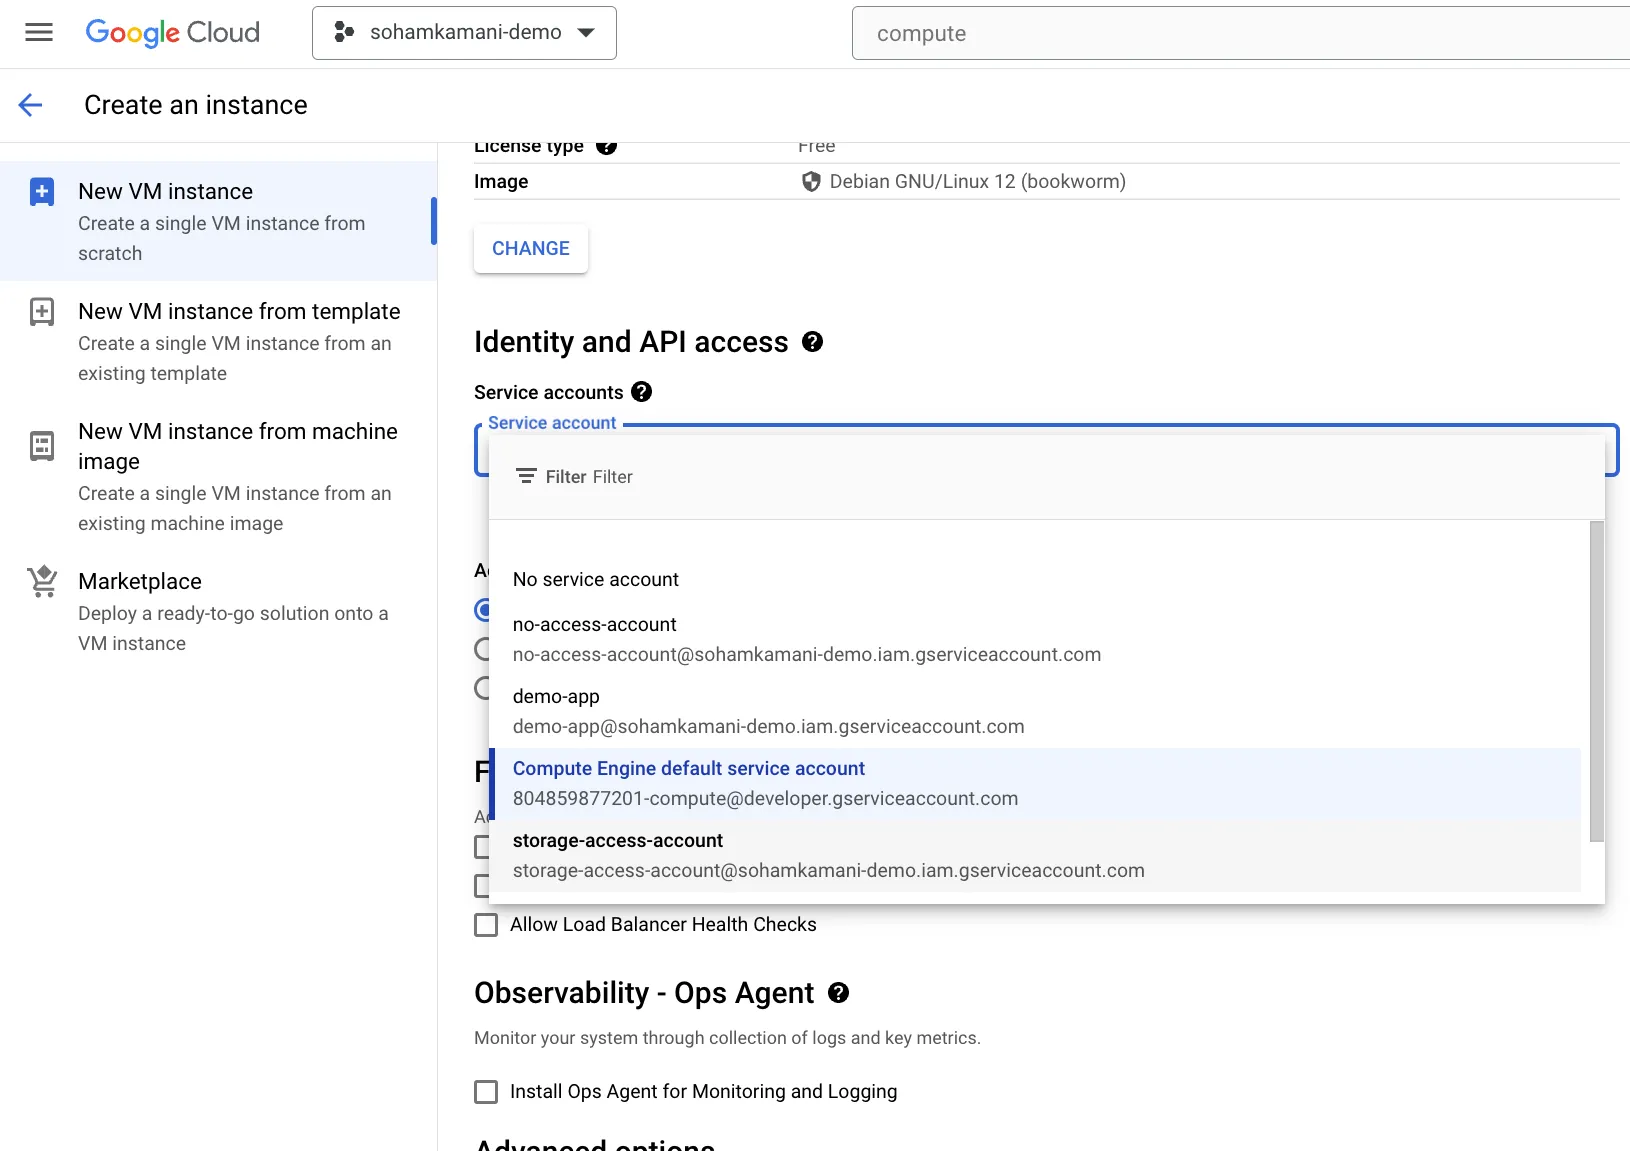
- Create a Cloud Storage Bucket: Create a new Cloud Storage bucket and upload some files to it. This will be the bucket that our application will interact with. In this case, I’ve created a bucket called
sohamkamani-example-bucketand uploaded a file namedsample.txt.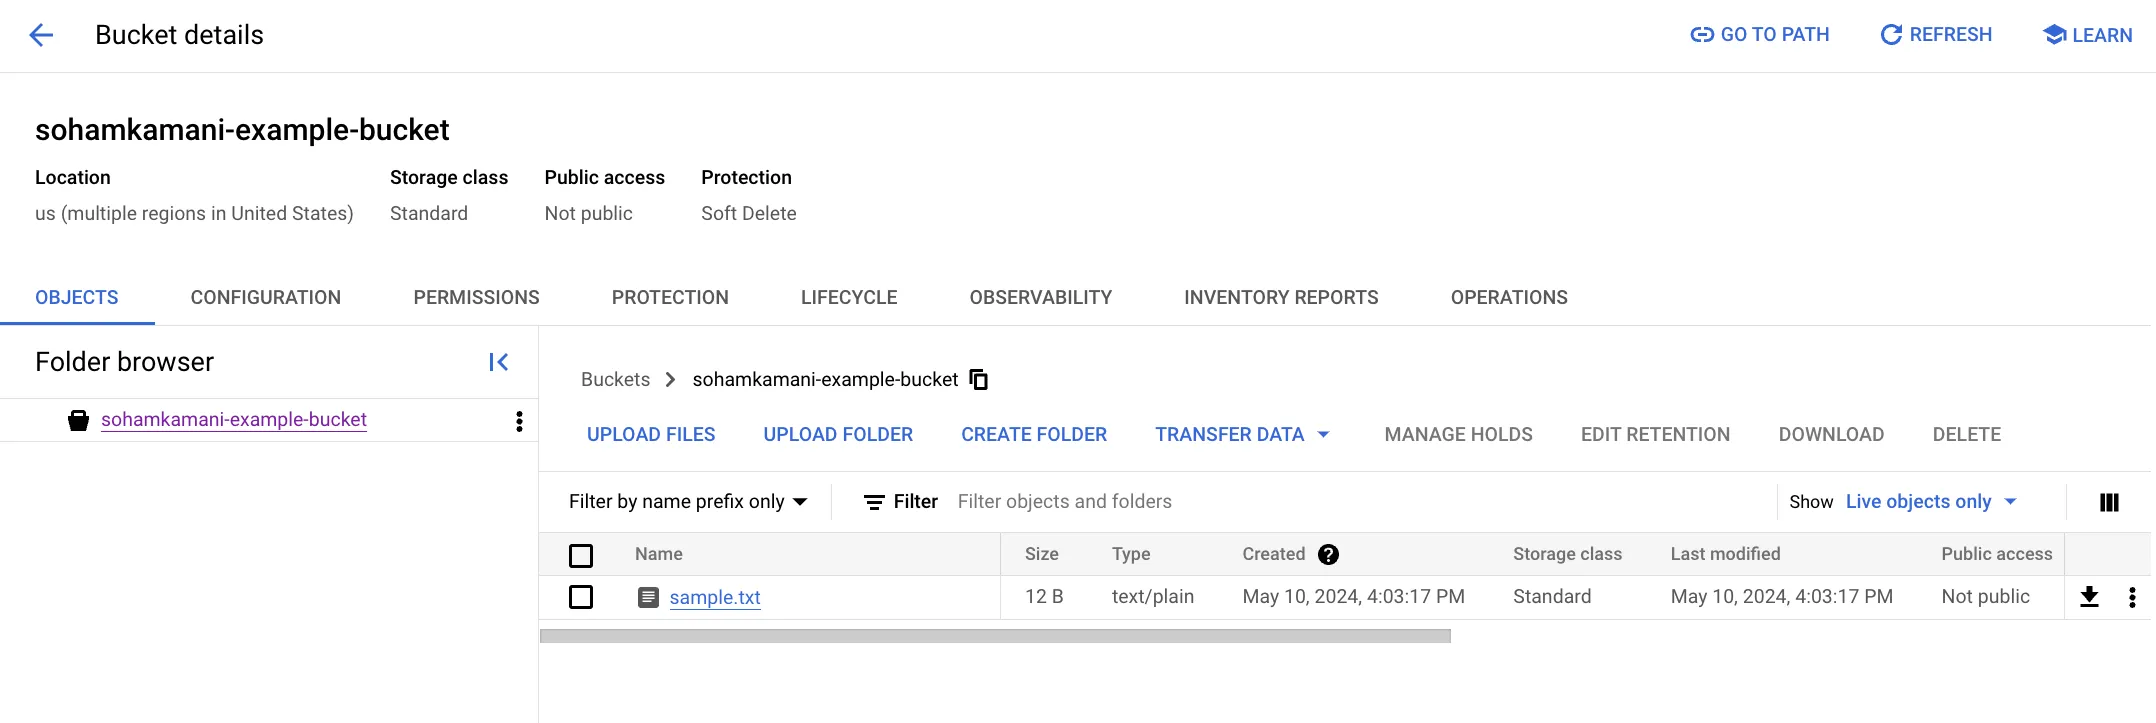
- Access Cloud Storage: Connect to the VM with the
no-access-accountidentity using SSH and try listing the contents of a Cloud Storage bucket using thegsutil lscommand. You should see an error message indicating that the service account doesn’t have the necessary permissions to access Cloud Storage.
If we try the same command on the VM with thesohamkamani@instance-20240510-101038:~$ gsutil ls gs://sohamkamani-example-bucket AccessDeniedException: 403 [email protected] does not have storage.objects.list access to the Google Cloud Storage bucket. Permission 'storage.objects.list' denied on resource (or it may not exist).storage-access-accountservice account, we should see the contents of the bucket.sohamkamani@instance-20240510-101038:~$ gsutil ls gs://sohamkamani-example-bucket gs://sohamkamani-example-bucket/sample.txt
Service Account Keys
Service account keys are a way to authenticate your application when it’s running outside of Google Cloud. These keys are used to prove the identity of your service account and grant access to GCP services.
You can create service account keys in the Google Cloud Console or using the gcloud command-line tool.
On the console, navigate to the IAM & Admin section, select the service account you want to create a key for, and click on the “Add Key” button.
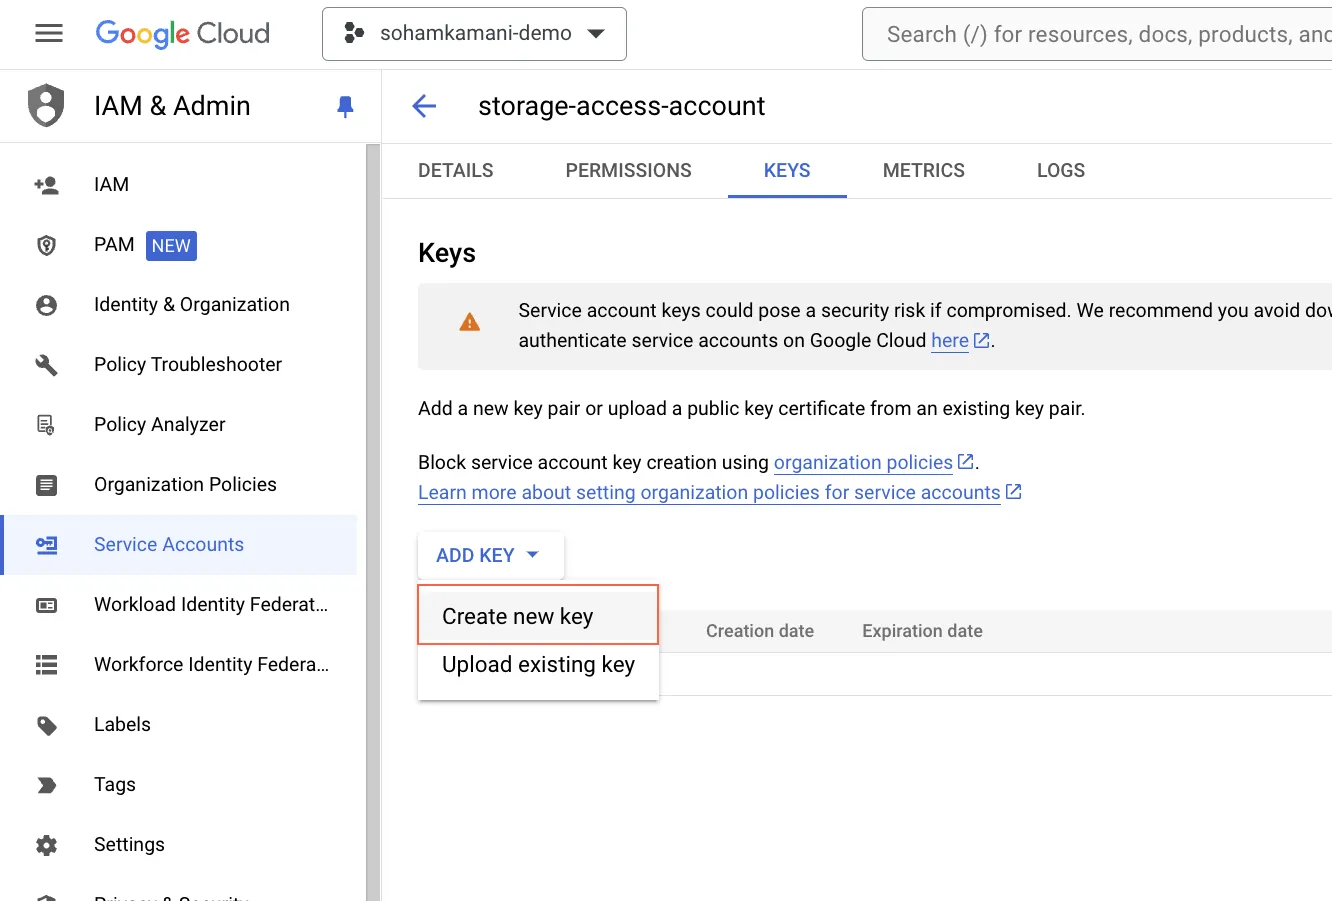
You can choose between JSON and P12 key formats. JSON keys are recommended for most use cases.
When you create a key, you’ll download a JSON file containing the key details. This file should be treated as sensitive information and stored securely.
Then, you can use this key to authenticate your application when it’s running outside of GCP. For example, you can set the GOOGLE_APPLICATION_CREDENTIALS environment variable to point to the JSON key file, allowing your application to authenticate and access GCP services.
Modifying Permissions of a Service Account
You can modify the permissions of a service account by changing the roles assigned to it. This can be done through the Google Cloud Console or by using the gcloud command-line tool.
In the console, navigate to the IAM & Admin section, select the service account you want to modify, and click on the “Edit” button. From there, you can add or remove roles as needed.
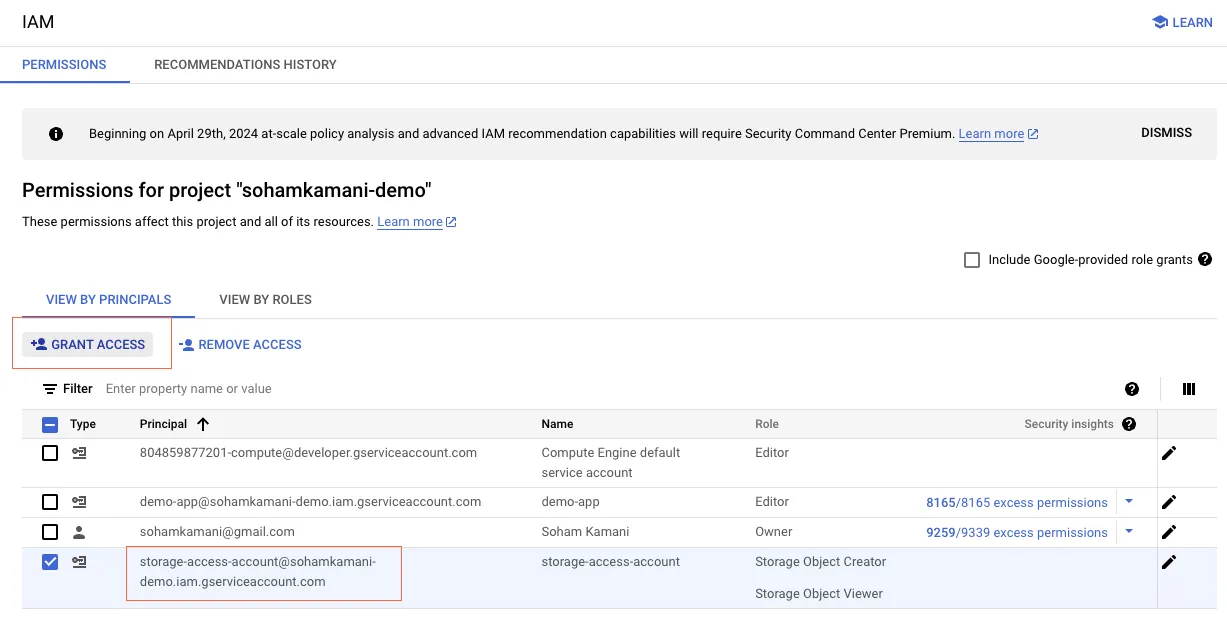
In this example, we’re adding the “Storage Object Admin” role to the storage-access-account service account.
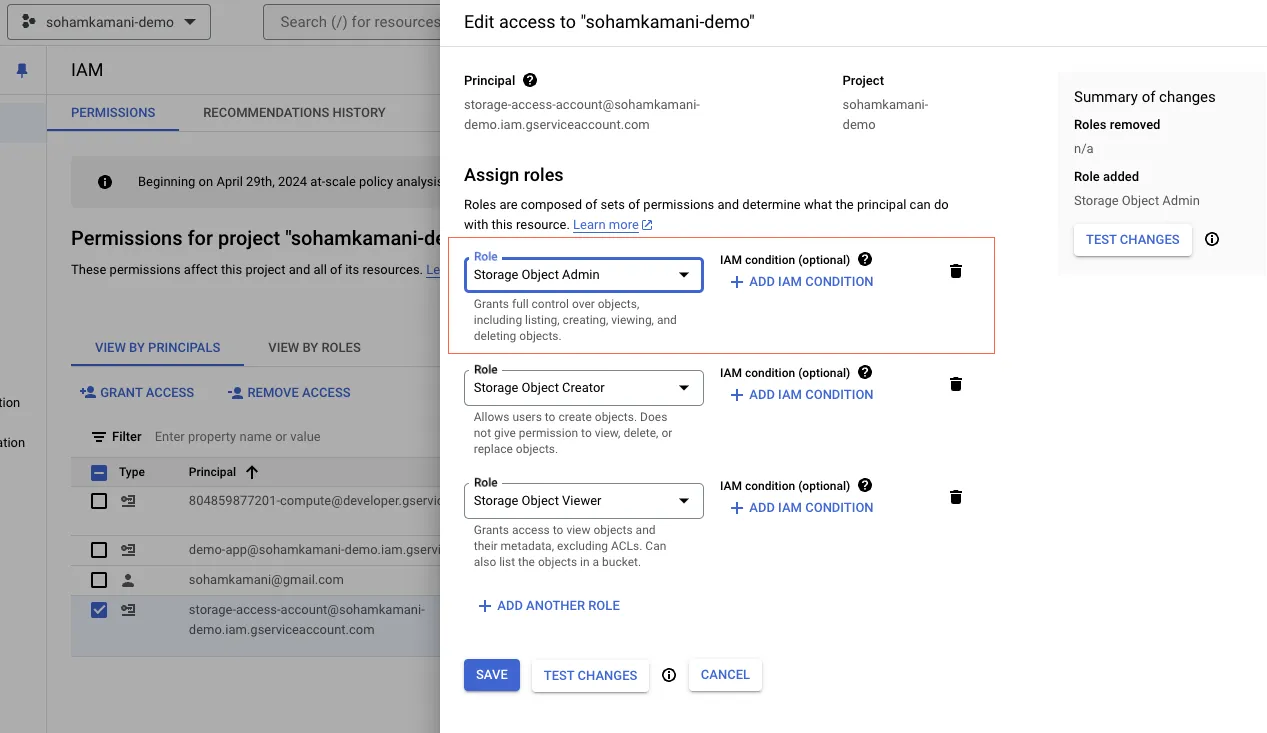
You can also modify the roles assigned to a service account using the gcloud command-line tool. Here’s an example of how you can add the “Storage Object Admin” role to the storage-access-account service account:
gcloud projects add-iam-policy-binding <your-project-id> \
  --member=serviceAccount:<your-service-account-email> \
  --role=roles/storage.objectAdmin
You can find the email associated with your service account in the service accounts page. In my case, the command would look like this:
gcloud projects add-iam-policy-binding sohamkamani-demo \
  --member=serviceAccount:[email protected] \
  --role=roles/storage.objectAdmin
Best Practices for Security and Control
When working with service accounts, adhering to best practices is crucial for maintaining a secure and well-managed GCP environment. Here are some key recommendations:
- Embrace the Principle of Least Privilege: Avoid assigning overly broad roles like “Owner” or “Editor” to your service accounts. Instead, carefully analyze your application’s needs and grant only the specific permissions it requires to function. This minimizes the potential impact of a compromised service account.
- Create User-Managed Service Accounts: While default service accounts exist for services like Compute Engine and App Engine, it’s best practice to create and use your own service accounts. This allows you to follow the principle of least privilege, granting only the specific permissions your application requires.
- Manage Service Account Keys Securely: Service account keys are used to authenticate your application when it’s running outside of GCP. Treat these keys with utmost care, similar to passwords. Avoid embedding them directly in your application code and instead leverage secure storage mechanisms like Secret Manager.