Table of Contents
Imagine deploying your entire full-stack application—frontend, backend, and database—as a single executable file. No complex server setup, no container orchestration, just one binary. This tutorial will show you how to achieve this seamless workflow using the power of SvelteKit for your frontend and PocketBase for a fast, all-in-one Go backend.
We’ll build a simple, secure, and scalable web app, assuming you have some basic web development knowledge. Let’s dive in!
What We Will Build
We will build a simple web application that allows users to sign up, log in, and manage a private list of “animals”. Each user will only be able to see the animals they have added.
The final result will be a single executable file that serves both the SvelteKit frontend and the PocketBase backend, including the database.
Part 1: Basic Frontend and Backend
Our first goal is to get a basic version of the application running. We’ll set up a SvelteKit frontend and a PocketBase backend, and display a list of animals from the database. At this stage, there will be no authentication or API rules.
Backend Setup (PocketBase)
First, initialize a new Go module in your project’s root directory and add the PocketBase dependency.
# In your project root
go mod init your-app-name
go get github.com/pocketbase/pocketbase
The key to our single-binary deployment is embedding the compiled frontend directly into our Go application. Here’s how it works in the main.go file:
package main

import (
	"embed"
	"io/fs"
	"log"

	"github.com/pocketbase/pocketbase"
	"github.com/pocketbase/pocketbase/apis"
	"github.com/pocketbase/pocketbase/core"
)

//go:embed all:app/build
var appHtmlDirectory embed.FS

func main() {
	app := pocketbase.New()

	appHtmlSubDirectory, err := fs.Sub(appHtmlDirectory, "app/build")
	if err != nil {
		log.Fatal(err)
	}

	app.OnServe().BindFunc(func(se *core.ServeEvent) error {
		// serves static files from the provided public dir (if exists)
		se.Router.GET("/{path...}", apis.Static(appHtmlSubDirectory, false))

		return se.Next()
	})

	if err := app.Start(); err != nil {
		log.Fatal(err)
	}
}
The most important line is //go:embed all:app/build. This Go compiler directive packages the entire app/build directory (our SvelteKit frontend’s production output) into the appHtmlDirectory variable.
Frontend Setup (SvelteKit)
If you don’t have a SvelteKit project, you can create one using the sv command line tool. This will scaffold a new project in the app directory.
npx sv create app

┌  Welcome to the Svelte CLI! (v0.10.5)
│
◇  Which template would you like?
│  SvelteKit minimal
│
◇  Add type checking with TypeScript?
│  Yes, using TypeScript syntax
│
◇  What would you like to add to your project? (use arrow keys / space bar)
│  sveltekit-adapter
│
◇  Which SvelteKit adapter would you like to use?
│  static
│
◆  Project created
│
◆  Successfully setup add-ons: sveltekit-adapter
│
◇  Which package manager do you want to install dependencies with?
│  npm
│
│  npx sv create --template minimal --types ts --add sveltekit-adapter="adapter:static" --install npm app
│
│
◆  Successfully installed dependencies with npm
│
◇  What's next? ───────────────────────────────╮
│                                              │
│  📁 Project steps                            │
│                                              │
│    1: cd app                                 │
│    2: npm run dev -- --open                  │
│                                              │
│  To close the dev server, hit Ctrl-C         │
│                                              │
│  Stuck? Visit us at https://svelte.dev/chat  │
│                                              │
├──────────────────────────────────────────────╯
│
└  You're all set!
Finally, we need to configure SvelteKit to build a Single Page Application (SPA). This involves two steps:
-
Configure the Adapter: Open
svelte.config.jsand add thefallbackoption. This ensures that all requests are routed toindex.html, allowing the client-side router to handle navigation.// svelte.config.js adapter: adapter({ fallback: 'index.html' // enable SPA mode }) -
Disable SSR: Since we are building a purely static SPA, we should disable Server-Side Rendering (SSR). Create a
src/routes/+layout.tsfile:export const ssr = false; export const prerender = true;
This configuration tells SvelteKit to generate a static shell (index.html) and handle all rendering in the browser. The built files will be output to the build directory, which matches our Go embedding configuration.
Displaying Animals
Let’s create a Svelte page to fetch and display animals from a animals collection in PocketBase.
<script>
    import { onMount } from 'svelte';
    import { pb } from '$lib/api'; // We will create this helper next

    let animals = $state([]);

    onMount(async () => {
        const resultList = await pb.collection('animals').getList(1, 50);
        animals = resultList.items;
    });
</script>

<h1>Animals</h1>

<ul>
    {#each animals as animal}
        <li>{animal.name}</li>
    {/each}
</ul>
To connect the frontend to the backend, we’ll create app/src/lib/api.ts:
import PocketBase from 'pocketbase';

const BASE_URL = import.meta.env.DEV ? 'http://127.0.0.1:8090/' : '/';
export const pb = new PocketBase(BASE_URL);
Creating the animals Collection
- Start your PocketBase server:
go run main.go serve. - Navigate to the Admin UI at
http://127.0.0.1:8090/_/. - Click + New Collection.
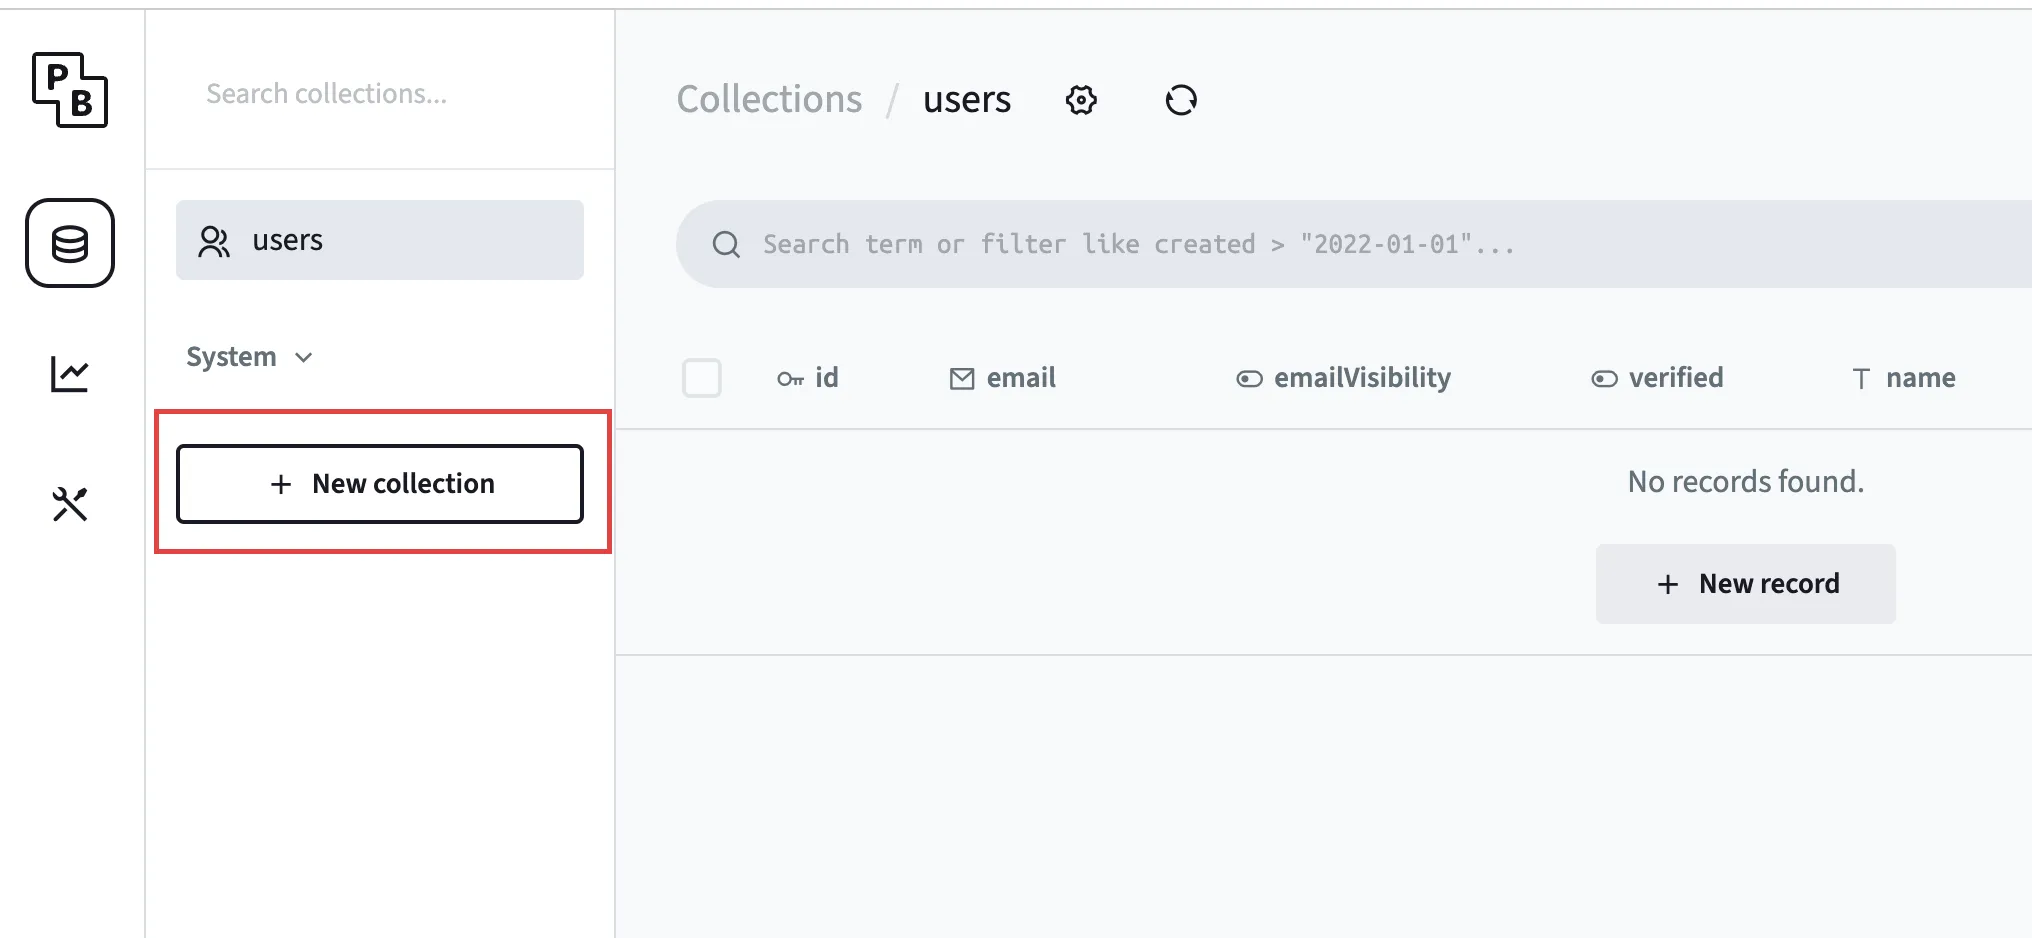
- Enter “animals” as the collection name.
- Add a
namefield of type “text”.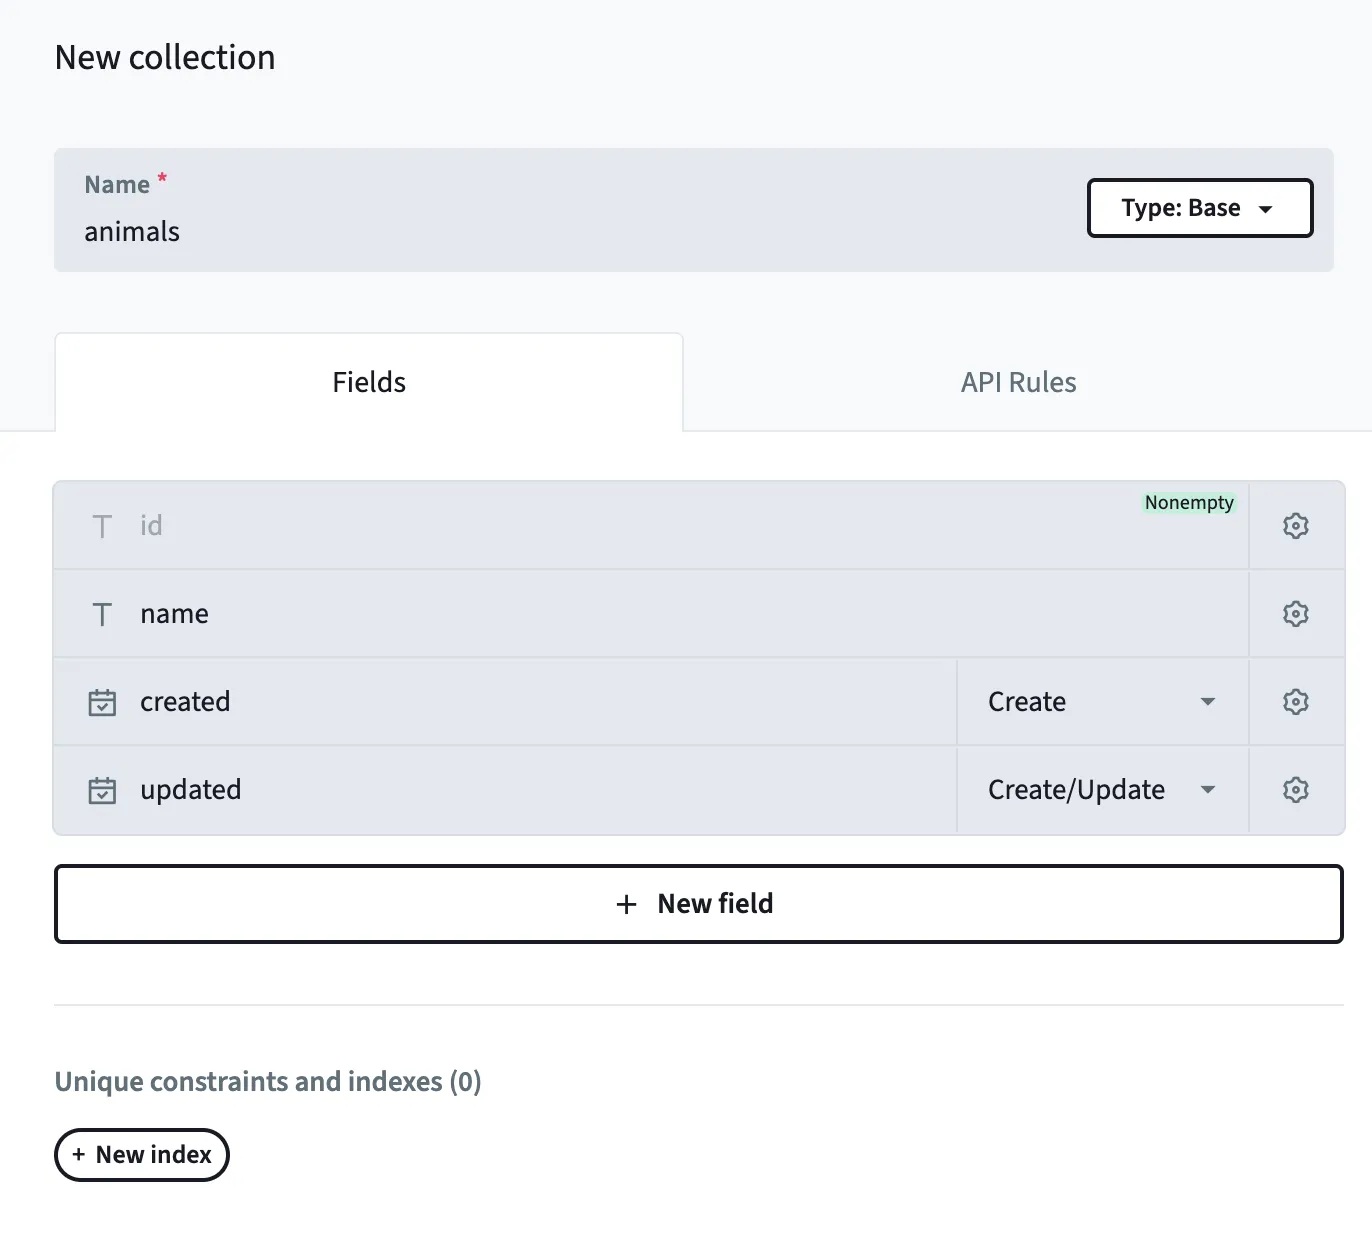
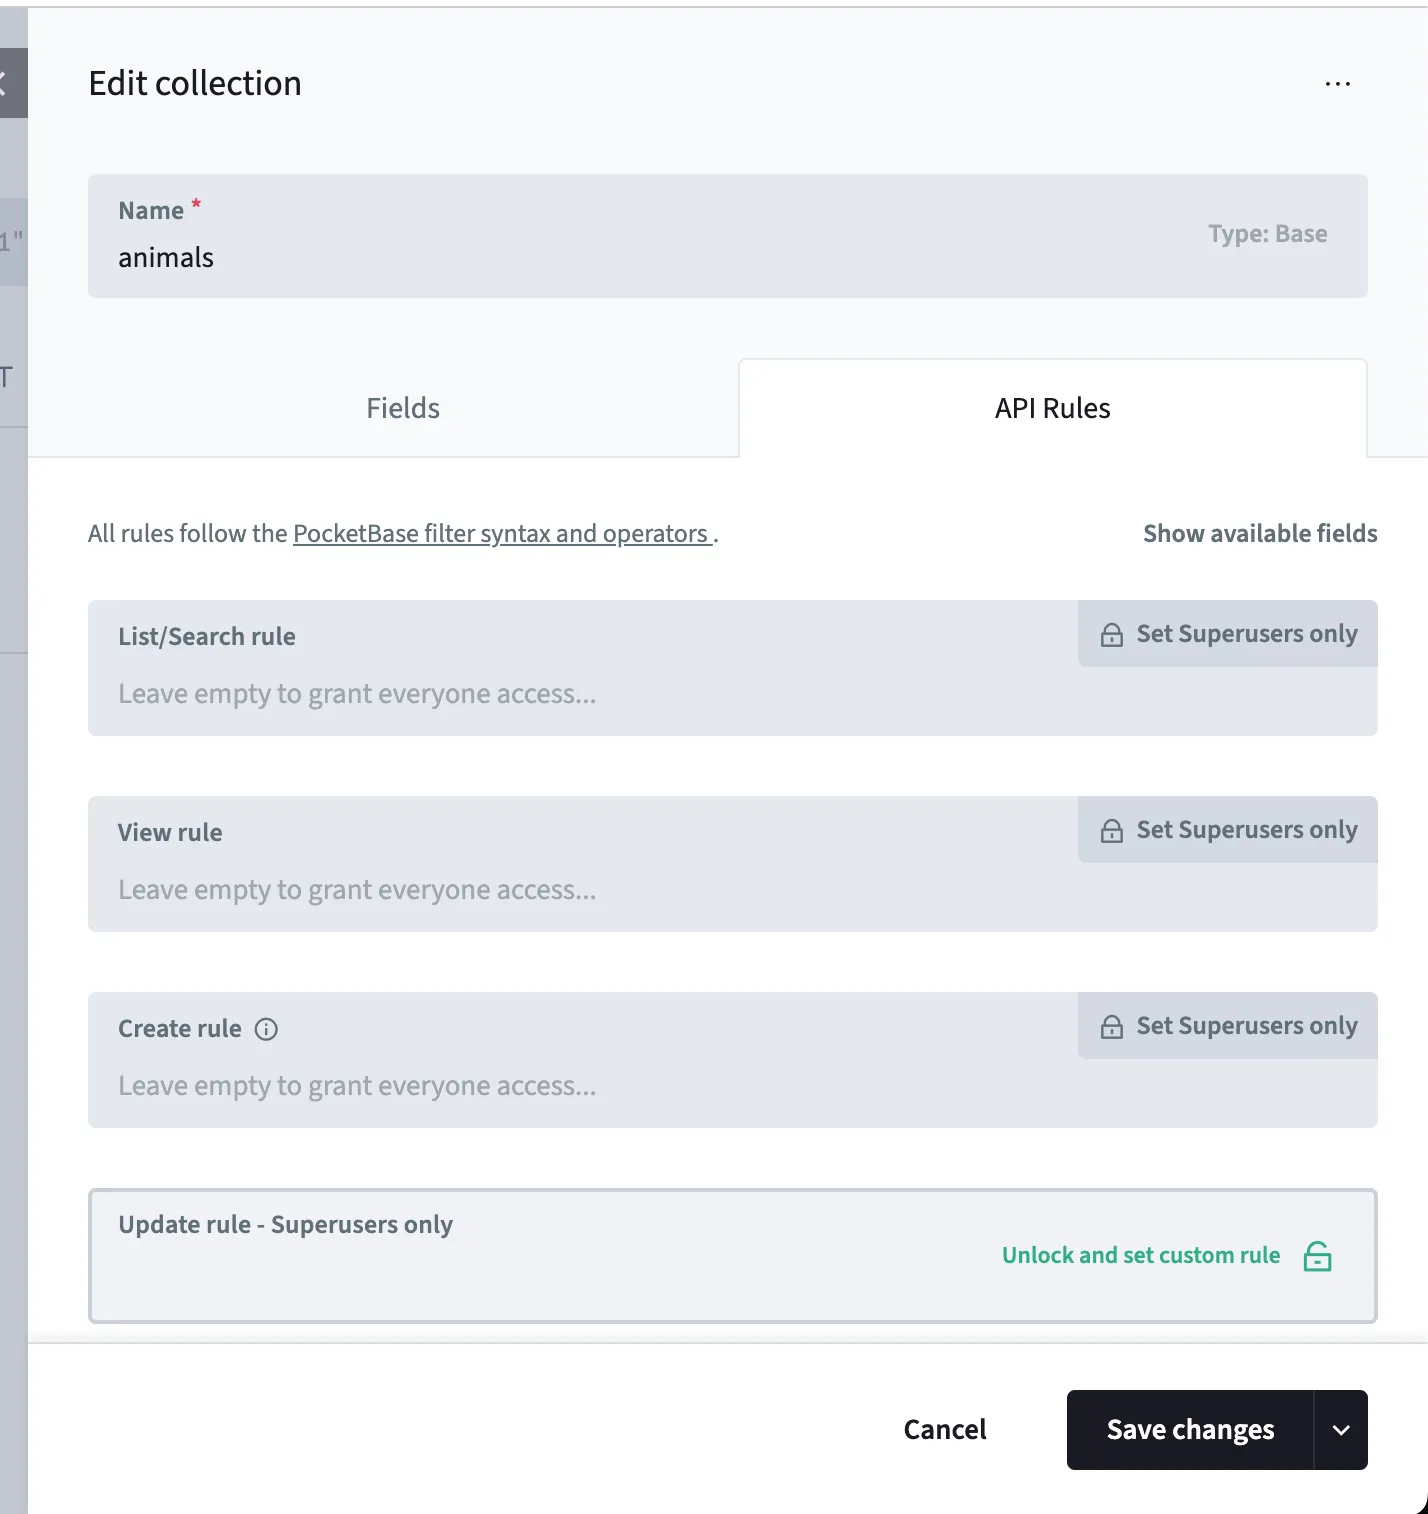
- Now, go to the API rules tab, and unlock all the rules. This is needed to make sure that we can view and edit this table.
- Click Create.
Once you’ve created the collection, you can add some animals to it using the Admin UI. We can then create some sample animals:
Running the Application
- Run the Backend:
go run main.go serve - Run the Frontend:
In a separate terminal, inside the
appdirectory:cd app npm run dev
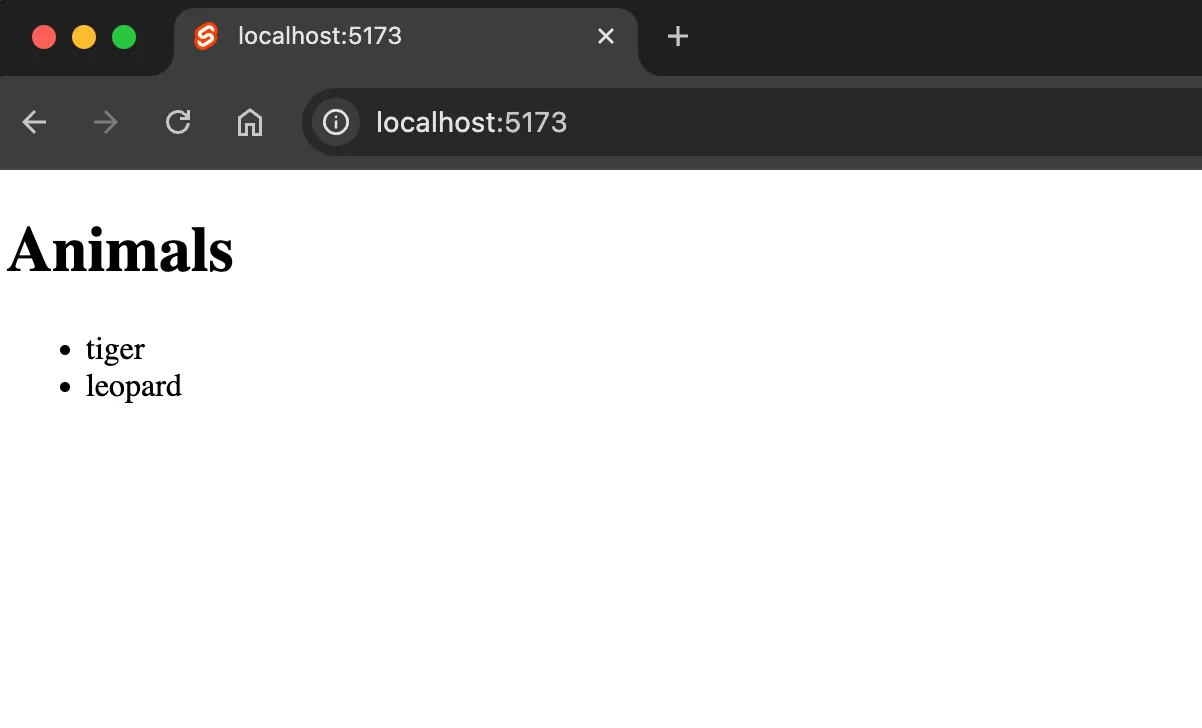
You should now see your SvelteKit app running and displaying a list of animals (if you’ve added any in the Admin UI).
Part 2: Adding Authentication
Now, let’s add a simple signup and login system.
Signup and Login Page
Create a Svelte component for user authentication with signup and login forms. This will use the PocketBase client to handle user registration and login.
<script>
	import { pb } from '$lib/api';

	let email = $state('');
	let password = $state('');
	let loading = $state(false);

	const signup = async () => {
		loading = true;
		try {
			await pb.collection('users').create({ email, password, passwordConfirm: password });
			await login();
		} catch (e) {
			alert(e.message);
		}
		loading = false;
	};

	const login = async () => {
		loading = true;

		try {
			await pb.collection('users').authWithPassword(email, password);
		} catch (e) {
			alert(e.message);
		}
		loading = false;
	};
</script>

<h1>Login or Signup</h1>

<form onsubmit={(e) => e.preventDefault()}>
	<input type="email" placeholder="Email" bind:value={email} />
	<input type="password" placeholder="Password" bind:value={password} />
	<button onclick={login} disabled={loading}>Login</button>
	<button onclick={signup} disabled={loading}>Signup</button>
</form>
Once a user is signed in, you can redirect them to the animal list page. PocketBase automatically creates a users collection when you first start it.
After a user signs up, you can verify their entry in the users table in the PocketBase Admin UI.
Part 3: Securing Data and Adding Content
In this section, we’ll restrict access to the animals collection so that users can only see and manage the animals they’ve created.
API Rules for animals
In the PocketBase Admin UI, navigate to the animals collection and update the API rules.
-
First, add a
userfield to theanimalscollection and set it as arelationto theuserscollection.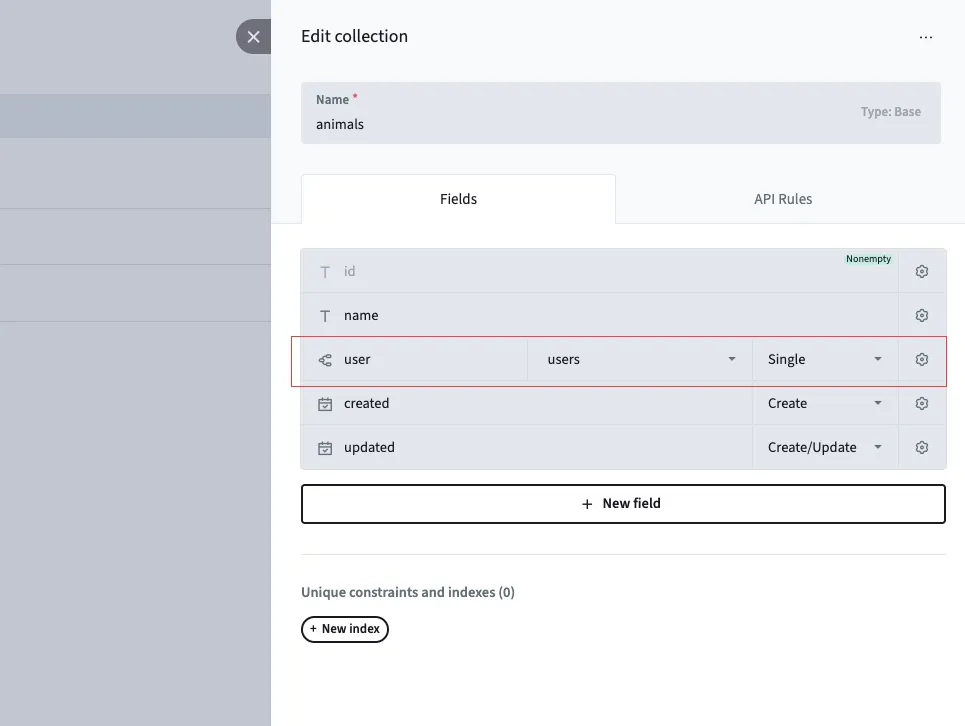
-
Set the following API rules:
- Create Rule:
"@request.body.user = @request.auth.id"- this means that when we create the record, theuserfield must match the currently logged-in user’s ID. - List/View/Update/Delete Rule:
"user = @request.auth.id"- this means that users can only list, view, update, or delete animals that are linked to their user ID.
- Create Rule:
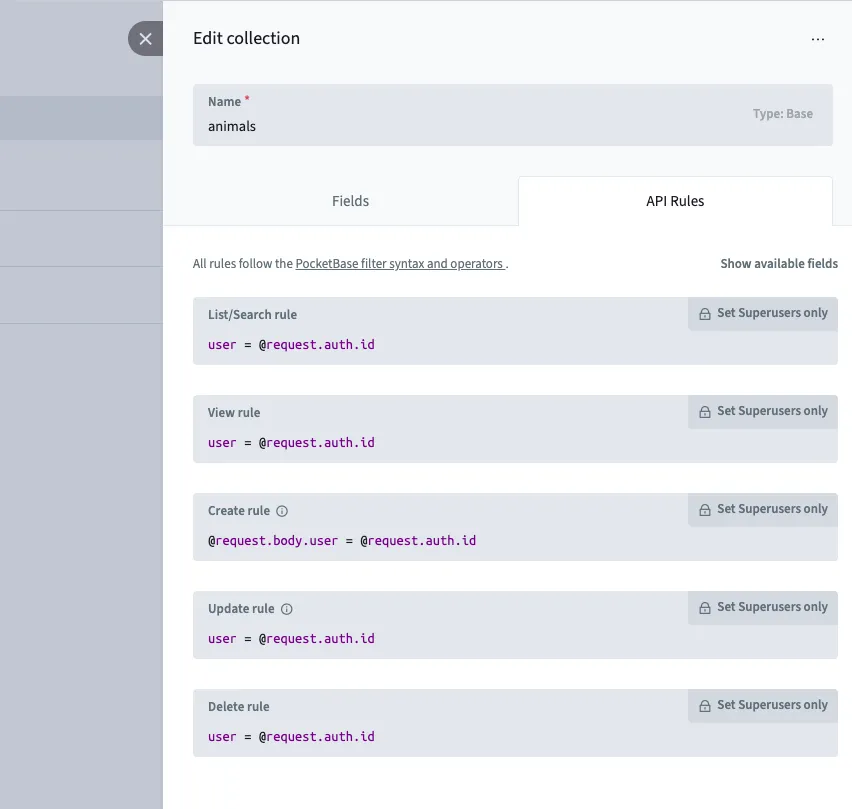
These rules ensure that:
- When creating an animal, the
userfield is automatically set to the current logged-in user. - Users can only list, view, update, or delete animals that are linked to their user ID.
Form to Add Animals
In your SvelteKit application, create a form on the animal list page that allows logged-in users to add new animals. The form submission logic should use the PocketBase client to create a new record in the animals collection.
// app/src/routes/+page.svelte
<script>
    // previous code same as before

    let animalName = $state('');

    const addAnimal = async () => {
      try {
        await pb.collection('animals').create({
          name: animalName,
          user: pb.authStore.record.id,
        });
        animals.push({ name: animalName });
        animalName = '';
      } catch (e) {
        alert(e.message);
      }
    };
</script>

<form onsubmit={(e) => e.preventDefault()}>
    <input type="text" placeholder="New animal name" bind:value={animalName} />
    <button onclick={addAnimal}>Add Animal</button>
</form>
Now, only authenticated users can add and view their own animals, creating a secure, multi-tenant application.
Part 4: Building and Deploying
The final step is to build the application into a single binary and deploy it.
Build for Production
To create the single binary, first build the frontend, then the backend:
# 1. Build the SvelteKit static site
cd app && npm run build && cd ..

# 2. Build the Go application
go build
Deploying the Application
You will now have a single executable file (e.g., your-app-name or your-app-name.exe). Copy this file to your server and run it. That’s it! Your entire application is now serving from that one binary.
For more advanced deployment scenarios, you can create a script to automate the process. Here is an example script to deploy to a Raspberry Pi:
#!/bin/bash
set -e

# 1. Build the frontend
echo "Building frontend..."
cd app && npm run build && cd ..

# 2. Build the backend for Raspberry Pi
echo "Building backend..."
GOOS=linux GOARCH=arm GOARM=7 go build -o myapp_rpi ./

# 3. Copy files to the server
echo "Deploying..."
rsync -avz ./myapp_rpi ./pb_data your_user@YOUR_SERVER_IP:/path/to/your/app/

# 4. Restart the service on the server
ssh your_user@YOUR_SERVER_IP "sudo systemctl restart myapp"

echo "Deployment complete!"
Conclusion
This SvelteKit and PocketBase architecture provides a robust, fast, and incredibly simple way to develop and deploy full-stack applications. By embedding the frontend into the backend, you get a single, portable binary that’s easy to manage and distribute. Happy coding!