Table of Contents
Large Language Models (LLMs) like ChatGPT and Gemini are incredibly powerful, but their knowledge is typically limited to public data.
What if you need an AI to answer questions about your company’s internal documents or a specific product’s confidential data? The solution is Retrieval-Augmented Generation, or RAG.
This powerful technique allows you to provide an AI with a private repository of information to use as a reference, enabling it to generate accurate, context-specific answers.
In this tutorial, we’ll walk through building a complete RAG pipeline using Spring Boot. You’ll learn how to create a Java application that takes a user’s question, retrieves relevant information from your private data source, and generates a precise, AI-powered response. We’ll cover everything from vector embeddings to deploying the final application.
If you just want to see the code, you can find it on GitHub.
Understanding the Core Concepts
Before we start coding, let’s break down the two key concepts that make this all possible: Vector Embeddings and RAG.
How do Vector Embeddings Work?
Have you ever wondered how AI models understand the meaning and relationships behind words? The magic is in vector embeddings, which are numerical representations of data like text. You can think of them as a special translator that converts a word, sentence, or even a whole document into a list of numbers called a vector.
What’s powerful is that these numbers are meaningful. Words or phrases with similar meanings will have vectors that are numerically close to each other. Imagine plotting these vectors on a simple 2D graph. The vectors for “dog” and “bark” would be clustered together, just as “cat” and “meow” would be. The distance between any two vectors indicates how closely related they are.
In a real application, these vectors have hundreds or even thousands of dimensions, but the principle remains the same. To find information relevant to a user’s query, we can convert the query to a vector and then search for the text vectors in our database that are closest to it.
What is Retrieval-Augmented Generation (RAG)?
RAG is a framework that enhances the responses of LLMs by connecting them to external knowledge bases. Instead of just relying on its training data, the model can query your private data source to find relevant information before generating an answer.
Here’s a simplified overview of the RAG flow:
- Retrieve: When a user asks a question, the system first searches a knowledge base (in our case, a vector database) for relevant documents.
- Augment: The content of these retrieved documents is then added to the user’s original question, creating an “augmented” prompt.
- Generate: This augmented prompt is sent to the LLM, which uses the provided context to generate a detailed and accurate answer.
This approach ensures the AI’s responses are not just generic but are grounded in the specific, proprietary information you provide.
The Overall Architecture
Our RAG system will consist of several key components working together. The following diagram illustrates the entire workflow from receiving a user’s query to returning an AI-generated response.
Setting Up the Backend Infrastructure
With the concepts clear, let’s prepare the necessary tools and database for our application.
Step 1: Running a Local Embedding Model
To create vector embeddings, you need a specialized AI model. While paid APIs are an option, you can easily run powerful open-source models on your local machine. A great tool for this is LM Studio.
- Download and install LM Studio.
- Use the search bar to find and download an embedding model. For this demo, we’ll use the
Nomic Embed Textmodel.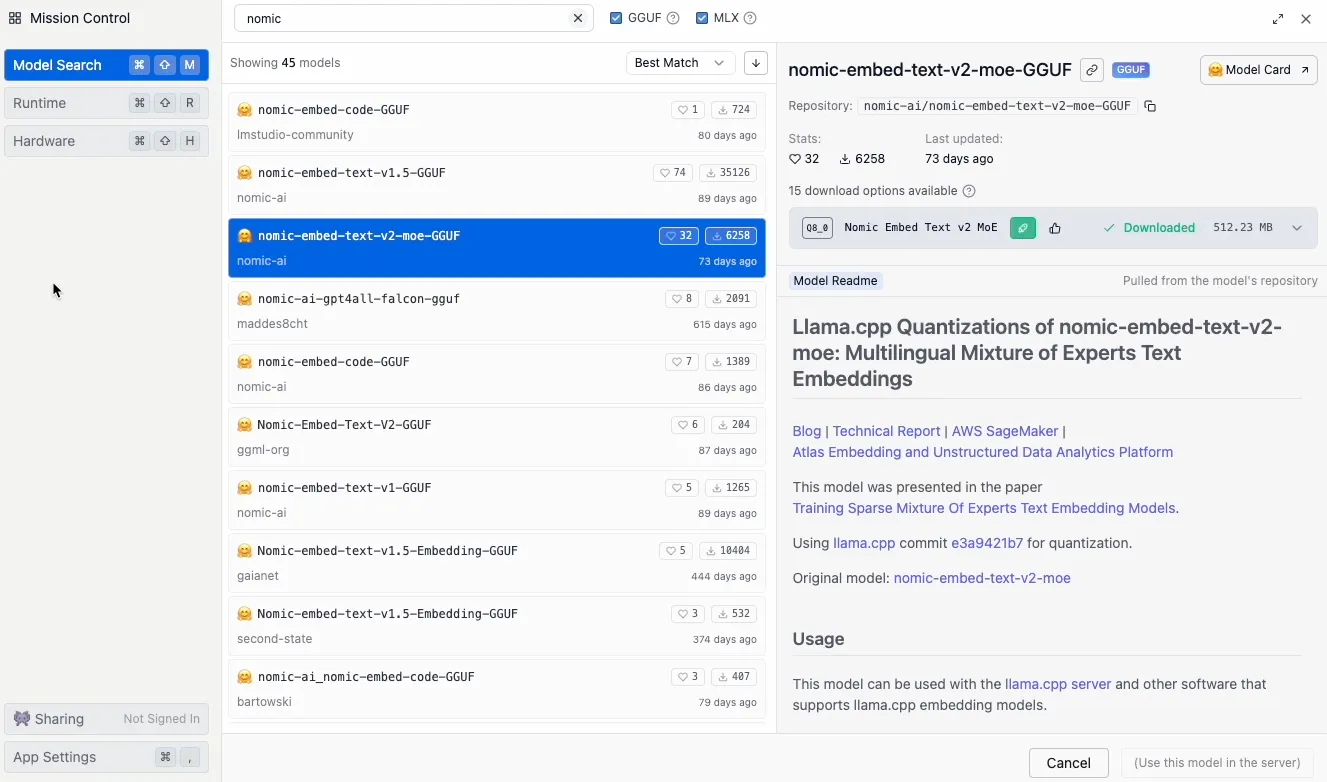
- Navigate to the Local Server tab.
- Select the downloaded model and click Start Server.
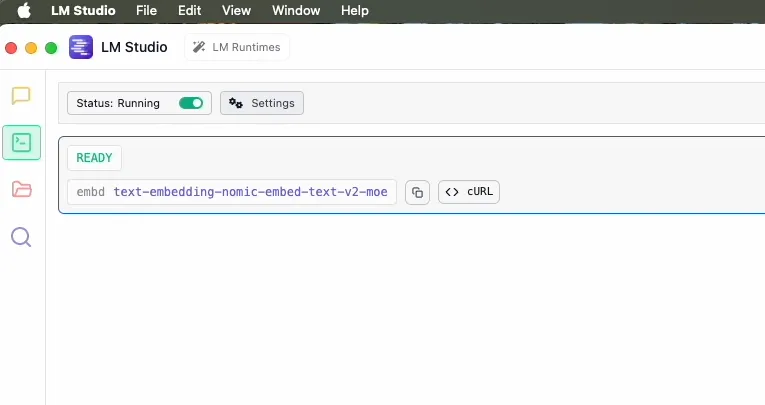
This creates a local API endpoint that is compatible with the OpenAI API, which makes it incredibly easy to integrate with libraries like Spring AI.
Step 2: Preparing the PostgreSQL Vector Store
Next, we need a place to store our text and its corresponding vector embeddings. We’ll use PostgreSQL with the pgvector extension, which adds powerful vector similarity search capabilities.
If you’re on a Mac, Postgres.app is a great option as it comes with pgvector pre-installed. Otherwise, follow the official installation guides for PostgreSQL and pgvector.
Once Postgres is running, use the psql command line to create your database and table:
-
Create the database:
CREATE DATABASE rag_demo; -
Connect to your new database:
\c rag_demo -
Enable extensions and create the table:
-- Enable required extensions
CREATE EXTENSION IF NOT EXISTS vector;
CREATE EXTENSION IF NOT EXISTS hstore;
CREATE EXTENSION IF NOT EXISTS "uuid-ossp";

-- Create the table to store our documents and embeddings
CREATE TABLE IF NOT EXISTS vector_store (
    id uuid DEFAULT uuid_generate_v4() PRIMARY KEY,
    content text,
    metadata json,
    embedding vector(768)
);
The
embeddingcolumn’s dimension (768) must match the output dimension of our Nomic Embed Text model. -
Create an index for efficient search:
CREATE INDEX ON vector_store USING HNSW (embedding vector_cosine_ops);HNSW(Hierarchical Navigable Small Worlds) is an indexing algorithm that significantly speeds up nearest-neighbor searches in high-dimensional spaces.
Building the Spring Boot Application
Now it’s time to write the code. We’ll use the Spring Initializr to create a new project.
Step 3: Project Setup and Dependencies
Head over to start.spring.io and create a new Gradle project with the following dependencies:
- Spring Web: To build our REST controller.
- Spring AI OpenAI Starter: To connect to our local embedding model (via its OpenAI-compatible API) and our online chat model.
- Spring AI PGVector Store Starter: To connect to our PostgreSQL vector database.
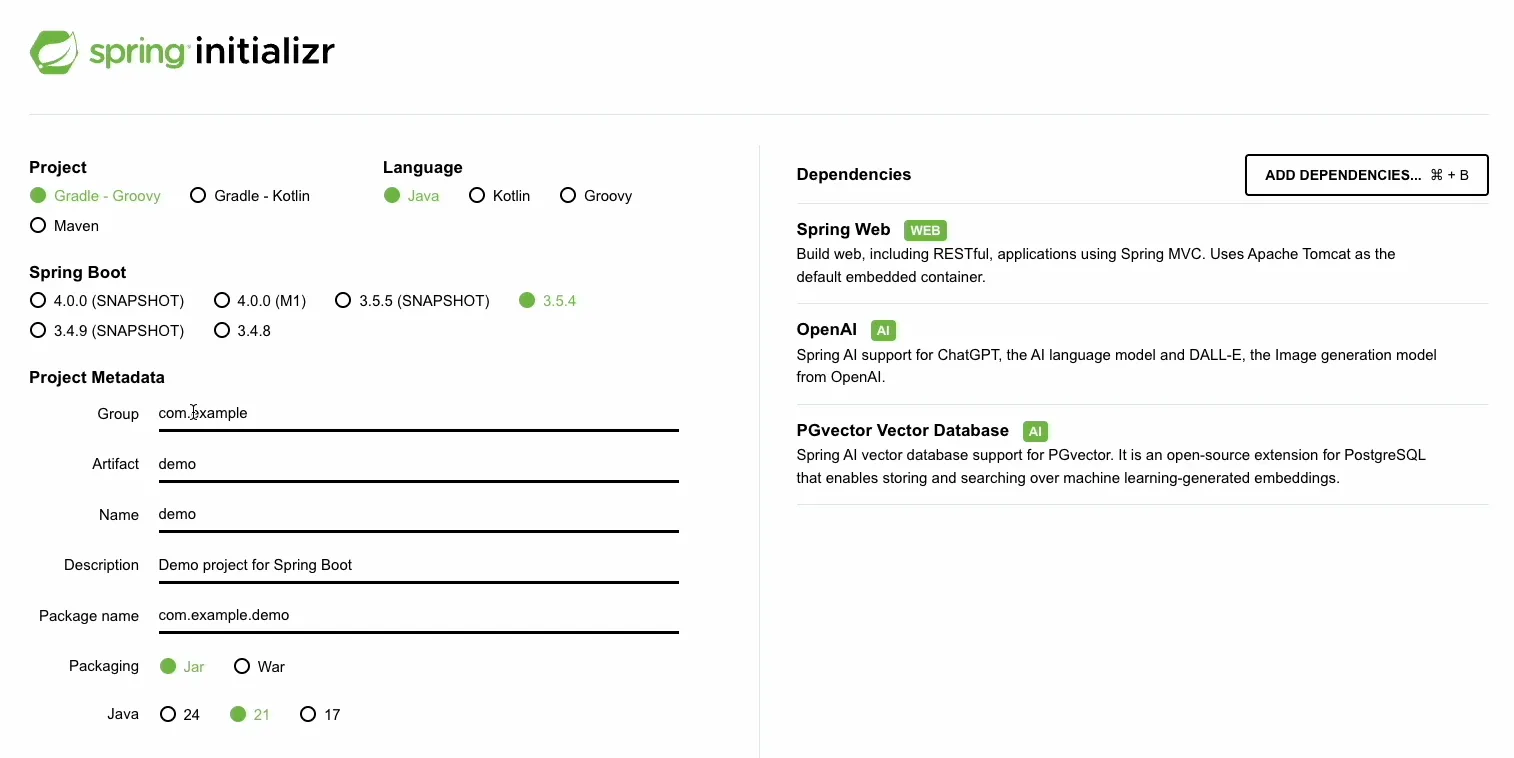
Here is the build.gradle file with the necessary dependencies:
plugins {
	id 'java'
	id 'org.springframework.boot' version '3.2.7'
	id 'io.spring.dependency-management' version '1.1.7'
}

group = 'com.sohamkamani'
version = '0.0.1-SNAPSHOT'

java {
	toolchain {
		languageVersion = JavaLanguageVersion.of(21)
	}
}

repositories {
	mavenCentral()
	maven { url 'https://repo.spring.io/milestone' }
	maven { url 'https://repo.spring.io/snapshot' }
	maven {
		name = 'Central Portal Snapshots'
		url = 'https://central.sonatype.com/repository/maven-snapshots/'
	}
}

ext {
	set('springAiVersion', "1.0.0")
}

dependencies {
  implementation 'org.springframework.boot:spring-boot-starter-web'
  implementation 'org.springframework.ai:spring-ai-advisors-vector-store'
  implementation 'org.springframework.ai:spring-ai-starter-model-openai'
  implementation 'org.springframework.ai:spring-ai-starter-vector-store-pgvector'
  testImplementation 'org.springframework.boot:spring-boot-starter-test'
  testRuntimeOnly 'org.junit.platform:junit-platform-launcher'
}

dependencyManagement {
	imports {
		mavenBom "org.springframework.ai:spring-ai-bom:${springAiVersion}"
	}
}

tasks.named('test') {
	useJUnitPlatform()
}
Step 4: Loading Data into the Vector Store (DocumentLoader)
To populate our database with proprietary information, we’ll create a DocumentLoader component. It implements CommandLineRunner, so its run method executes once on application startup.
For this example, we’ll feed our RAG system information about a fictional database called “StarlightDB”.
package com.sohamkamani.spring_rag_demo.rag;

import java.util.List;
import org.springframework.ai.document.Document;
import org.springframework.ai.vectorstore.VectorStore;
import org.springframework.boot.CommandLineRunner;
import org.springframework.stereotype.Component;

@Component
public class DocumentLoader implements CommandLineRunner {

    private final VectorStore vectorStore;

    public DocumentLoader(VectorStore vectorStore) {
        this.vectorStore = vectorStore;
    }

    @Override
    public void run(String... args) {
        List<Document> documents = List.of(
            new Document("StarlightDB is a serverless graph database designed for real-time analytics on complex, interconnected data."),
            new Document("The core of StarlightDB is its 'Quantum-Leap' query engine, which uses speculative execution to deliver query results up to 100x faster than traditional graph databases."),
            new Document("StarlightDB features 'Chrono-Sync' for effortless time-travel queries, allowing developers to query the state of their graph at any point in the past."),
            new Document("StarlightDB includes a built-in visualization tool called 'Nebula' that renders interactive 3D graphs directly within the development environment for easier analysis."),
            new Document("Security in StarlightDB is handled by 'Cosmic Shield', which provides end-to-end encryption and fine-grained access control at the node and edge level.")
        );
        vectorStore.add(documents);
        System.out.println("Documents loaded into VectorStore.");
    }
}
When vectorStore.add() is called, Spring AI automatically sends our text to the configured embedding model, gets the vectors back, and stores both the original text and the embeddings in our pgvector table.
Step 5: Implementing the RAG Service (RagService)
The RagService contains the core retrieval and generation logic.
package com.sohamkamani.spring_rag_demo.rag;

import java.util.List;
import java.util.Map;
import java.util.stream.Collectors;
import org.springframework.ai.chat.client.ChatClient;
import org.springframework.ai.chat.messages.UserMessage;
import org.springframework.ai.chat.prompt.Prompt;
import org.springframework.ai.chat.prompt.SystemPromptTemplate;
import org.springframework.ai.document.Document;
import org.springframework.ai.vectorstore.SearchRequest;
import org.springframework.ai.vectorstore.VectorStore;
import org.springframework.beans.factory.annotation.Value;
import org.springframework.core.io.Resource;
import org.springframework.stereotype.Service;

@Service
public class RagService {

    private final ChatClient chatClient;
    private final VectorStore vectorStore;

    @Value("classpath:/prompts/rag-prompt.st")
    private Resource ragPromptTemplate;

    public RagService(ChatClient.Builder chatClientBuilder, VectorStore vectorStore) {
        this.chatClient = chatClientBuilder.build();
        this.vectorStore = vectorStore;
    }

    public String retrieveAndGenerate(String message) {
        // 1. Retrieve similar documents
        List<Document> similarDocuments = vectorStore.similaritySearch(SearchRequest.builder().query(message).topK(4).build());
        String information = similarDocuments.stream()
                .map(Document::getText)
                .collect(Collectors.joining("\n"));

        // 2. Augment the prompt
        SystemPromptTemplate systemPromptTemplate = new SystemPromptTemplate(ragPromptTemplate);
        Prompt prompt = new Prompt(List.of(
                systemPromptTemplate.createMessage(Map.of("information", information)),
                new UserMessage(message)));

        // 3. Generate the response
        return chatClient.prompt(prompt).call().content();
    }
}
Step 6: Creating the API Endpoint (RagController)
Finally, the RagController exposes a simple REST endpoint to interact with our service.
package com.sohamkamani.spring_rag_demo.rag;

import org.springframework.web.bind.annotation.PostMapping;
import org.springframework.web.bind.annotation.RequestBody;
import org.springframework.web.bind.annotation.RestController;

@RestController
public class RagController {

    private final RagService ragService;

    public RagController(RagService ragService) {
        this.ragService = ragService;
    }

    @PostMapping("/ai/rag")
    public String generate(@RequestBody MessageRequest request) {
        return ragService.retrieveAndGenerate(request.message());
    }

    public static record MessageRequest(String message) {
    }
}
Step 7: Configuring the Application
All the components are tied together in the application.properties file.
# src/main/resources/application.properties

spring.application.name=spring-rag-demo

# PostgreSQL Configuration
spring.datasource.url=jdbc:postgresql://localhost:5432/rag_demo
spring.datasource.username=soham
# spring.datasource.password=password
spring.datasource.driver-class-name=org.postgresql.Driver

# Spring AI OpenAI Configuration for LOCAL EMBEDDING MODEL
spring.ai.openai.base-url=http://127.0.0.1:1234
spring.ai.openai.api-key=""
spring.ai.openai.embedding.options.model=text-embedding-nomic-embed-text-v2-moe
spring.ai.openai.embedding.options.dimensions=768

# Spring AI OpenAI Configuration for ONLINE CHAT MODEL (via OpenRouter)
spring.ai.openai.chat.base-url=https://openrouter.ai/api
spring.ai.openai.chat.api-key=${OPENROUTER_API_KEY}
spring.ai.openai.chat.options.model=google/gemini-2.5-flash

# Spring AI PgVector Configuration
spring.ai.vectorstore.pgvector.index-type=HNSW
spring.ai.vectorstore.pgvector.distance-type=COSINE_DISTANCE
spring.ai.vectorstore.pgvector.dimensions=768
We also need a prompt template file at src/main/resources/prompts/rag-prompt.st to guide the LLM.
You are a helpful assistant. Use the following information to answer the question in detail. Please use a friendly and professional tone. Please acknowledge the question and relate the answer back to it.
If the answer is not in the provided information, say "I don't know."

Information:
{information}

Answer:
Running and Testing the RAG Pipeline
Let’s see our application in action!
-
Start the application:
OPENROUTER_API_KEY=YOUR_OPENROUTER_API_KEY ./gradlew bootRunYou should see the log
Documents loaded into VectorStore.on startup. -
Test the endpoint: Open a new terminal and use
curlto send a question to the/ai/ragendpoint.Question: “is starlight secure?”
curl -X POST -H "Content-Type: application/json" http://localhost:8080/ai/rag -d '{"message": "is starlight secure?"}'Response:
"Yes, StarlightDB is secure!\n\nYou asked if StarlightDB is secure, and I'm happy to tell you that it is. Security in StarlightDB is managed by a feature called 'Cosmic Shield'. This provides comprehensive protection through end-to-end encryption and also offers fine-grained access control. This control is applied at both the node and edge levels, ensuring robust security for your data."The model correctly answered using the imaginary information about “Cosmic Shield” that only exists in our private vector store!
Production Considerations
While this example works well, here are a few things to consider for a production environment:
- Document Chunking: Our example uses small text snippets. For large documents, similarity search works better if you break them down into smaller, logical chunks. Each chunk can then be stored as a separate entry in your vector store.
- Embedding Quality: The performance of your RAG system heavily depends on the quality of your embeddings. The Nomic model is a great start, but you might want to experiment with other models, including paid APIs like OpenAI’s Ada or Google’s Gemini embeddings, to see what works best for the nuances of your specific data.