Table of Contents
This post highlights some of the key components of good documentation, and goes through some of the steps you could take to improve the way you document your code.
Documentation is one of the most important and under-rated aspects of any library or open-source project. If you are writing code that will be used by someone other than yourself, it needs to be documented. Period.
After using many libraries (both open-source and private), and writing a few of my own, I noticed that all good documentation can be broken down into a bunch of distinct elements.
The Different Components of Documentation
We can break down the documentation of any major library or framework into six components:

Each component has a unique role to play and is required at different stages in the library’s every-day usage.
Let’s look into each one in more detail:
A Short Description
This should be a couple of sentences about what your library is, or what it does, and nothing else.
This is the first thing that every new user sees, and gives them an idea about what to expect. This is also what search engines will use to index your repository webpage, so it should be as short as possible while still giving a concise description of the library.
The description is normally placed in the beginning of the repository webpage, or in the first few lines of the Readme file.
Let’s see some examples of descriptions of some popular open-source libraries:
- React : A declarative, efficient, and flexible JavaScript library for building user interfaces.
- Protobuf : Protocol Buffers (a.k.a., protobuf) are Google’s language-neutral, platform-neutral, extensible mechanism for serializing structured data.
- Redis : Redis is an in-memory database that persists on disk. The data model is key-value, but many different kind of values are supported: Strings, Lists, Sets, Sorted Sets, Hashes, Streams, HyperLogLogs, Bitmaps.
For all the above projects, their descriptions are short, and tell you exactly what they do, without adding too much fluff.
The Getting Started Guide
This should include a small (often the most basic) example of how to use the library, along with some steps on how to install it, if necessary.
If the short description tells the user what your library is, the “Getting Started” example should tell them how to use it.
This, in my opinion, is the most important part of your documentation, because it’s a sort of elevator pitch to your users. Reading the quick start guide of any project gives their users a good idea of what their API looks like, and how well it fits their use case.
Consider the quick start guide of React, for example:
function HelloMessage({ name }) {
  return <div>Hello {name}</div>;
}

ReactDOM.render(
  <HelloMessage name="Taylor" />,
  document.getElementById('container')
);
It’s only 8 lines of code, but conveys several of Reacts core concepts:
- Abstracting DOM elements as components (using the
HelloMessagefunction) - The use of JSX for describing components.
- React as a declarative rendering library (rendering
HelloMessageonto the DOM usingReactDOM.render)
Tutorials
Tutorials include instructions on how to use the library for common use cases.
While writing tutorials, think of all the situations that your library might be used for. Then, take the most common use cases, and try to explain to your users how they should go about implementing them.
Often, the format for these tutorials is a couple of lines of instructions followed by some code snippets.
Let’s look at the tutorials provided by Gin, which is a web framework written in Go. They cover nearly all of the common use cases for building an HTTP web server.

Each tutorial comes with a couple of lines of instructions (either as text, or as comments in the code), and the code snippet itself.
Tutorials are most often placed in the projects Readme, or on its website, with links in the Readme.
Sample Projects
“Sample Projects” are different from “Tutorials” in that they are not instructional, but rather just a group of working examples that demonstrate how to use the library in practice.
As good as tutorials may be, sometimes your users want a working project that they can refer to for how to integrate your library into their code.
Writing sample projects also gives you early feedback on how your library’s API works with real-world code. Creating a sample project means putting yourself in your user’s shoes and actually making something useful with your library.
Sample projects are normally put in their own dedicated folders or repositories.
Following the excellent tutorials of the “Gin” Go library, let’s take a look at their examples:
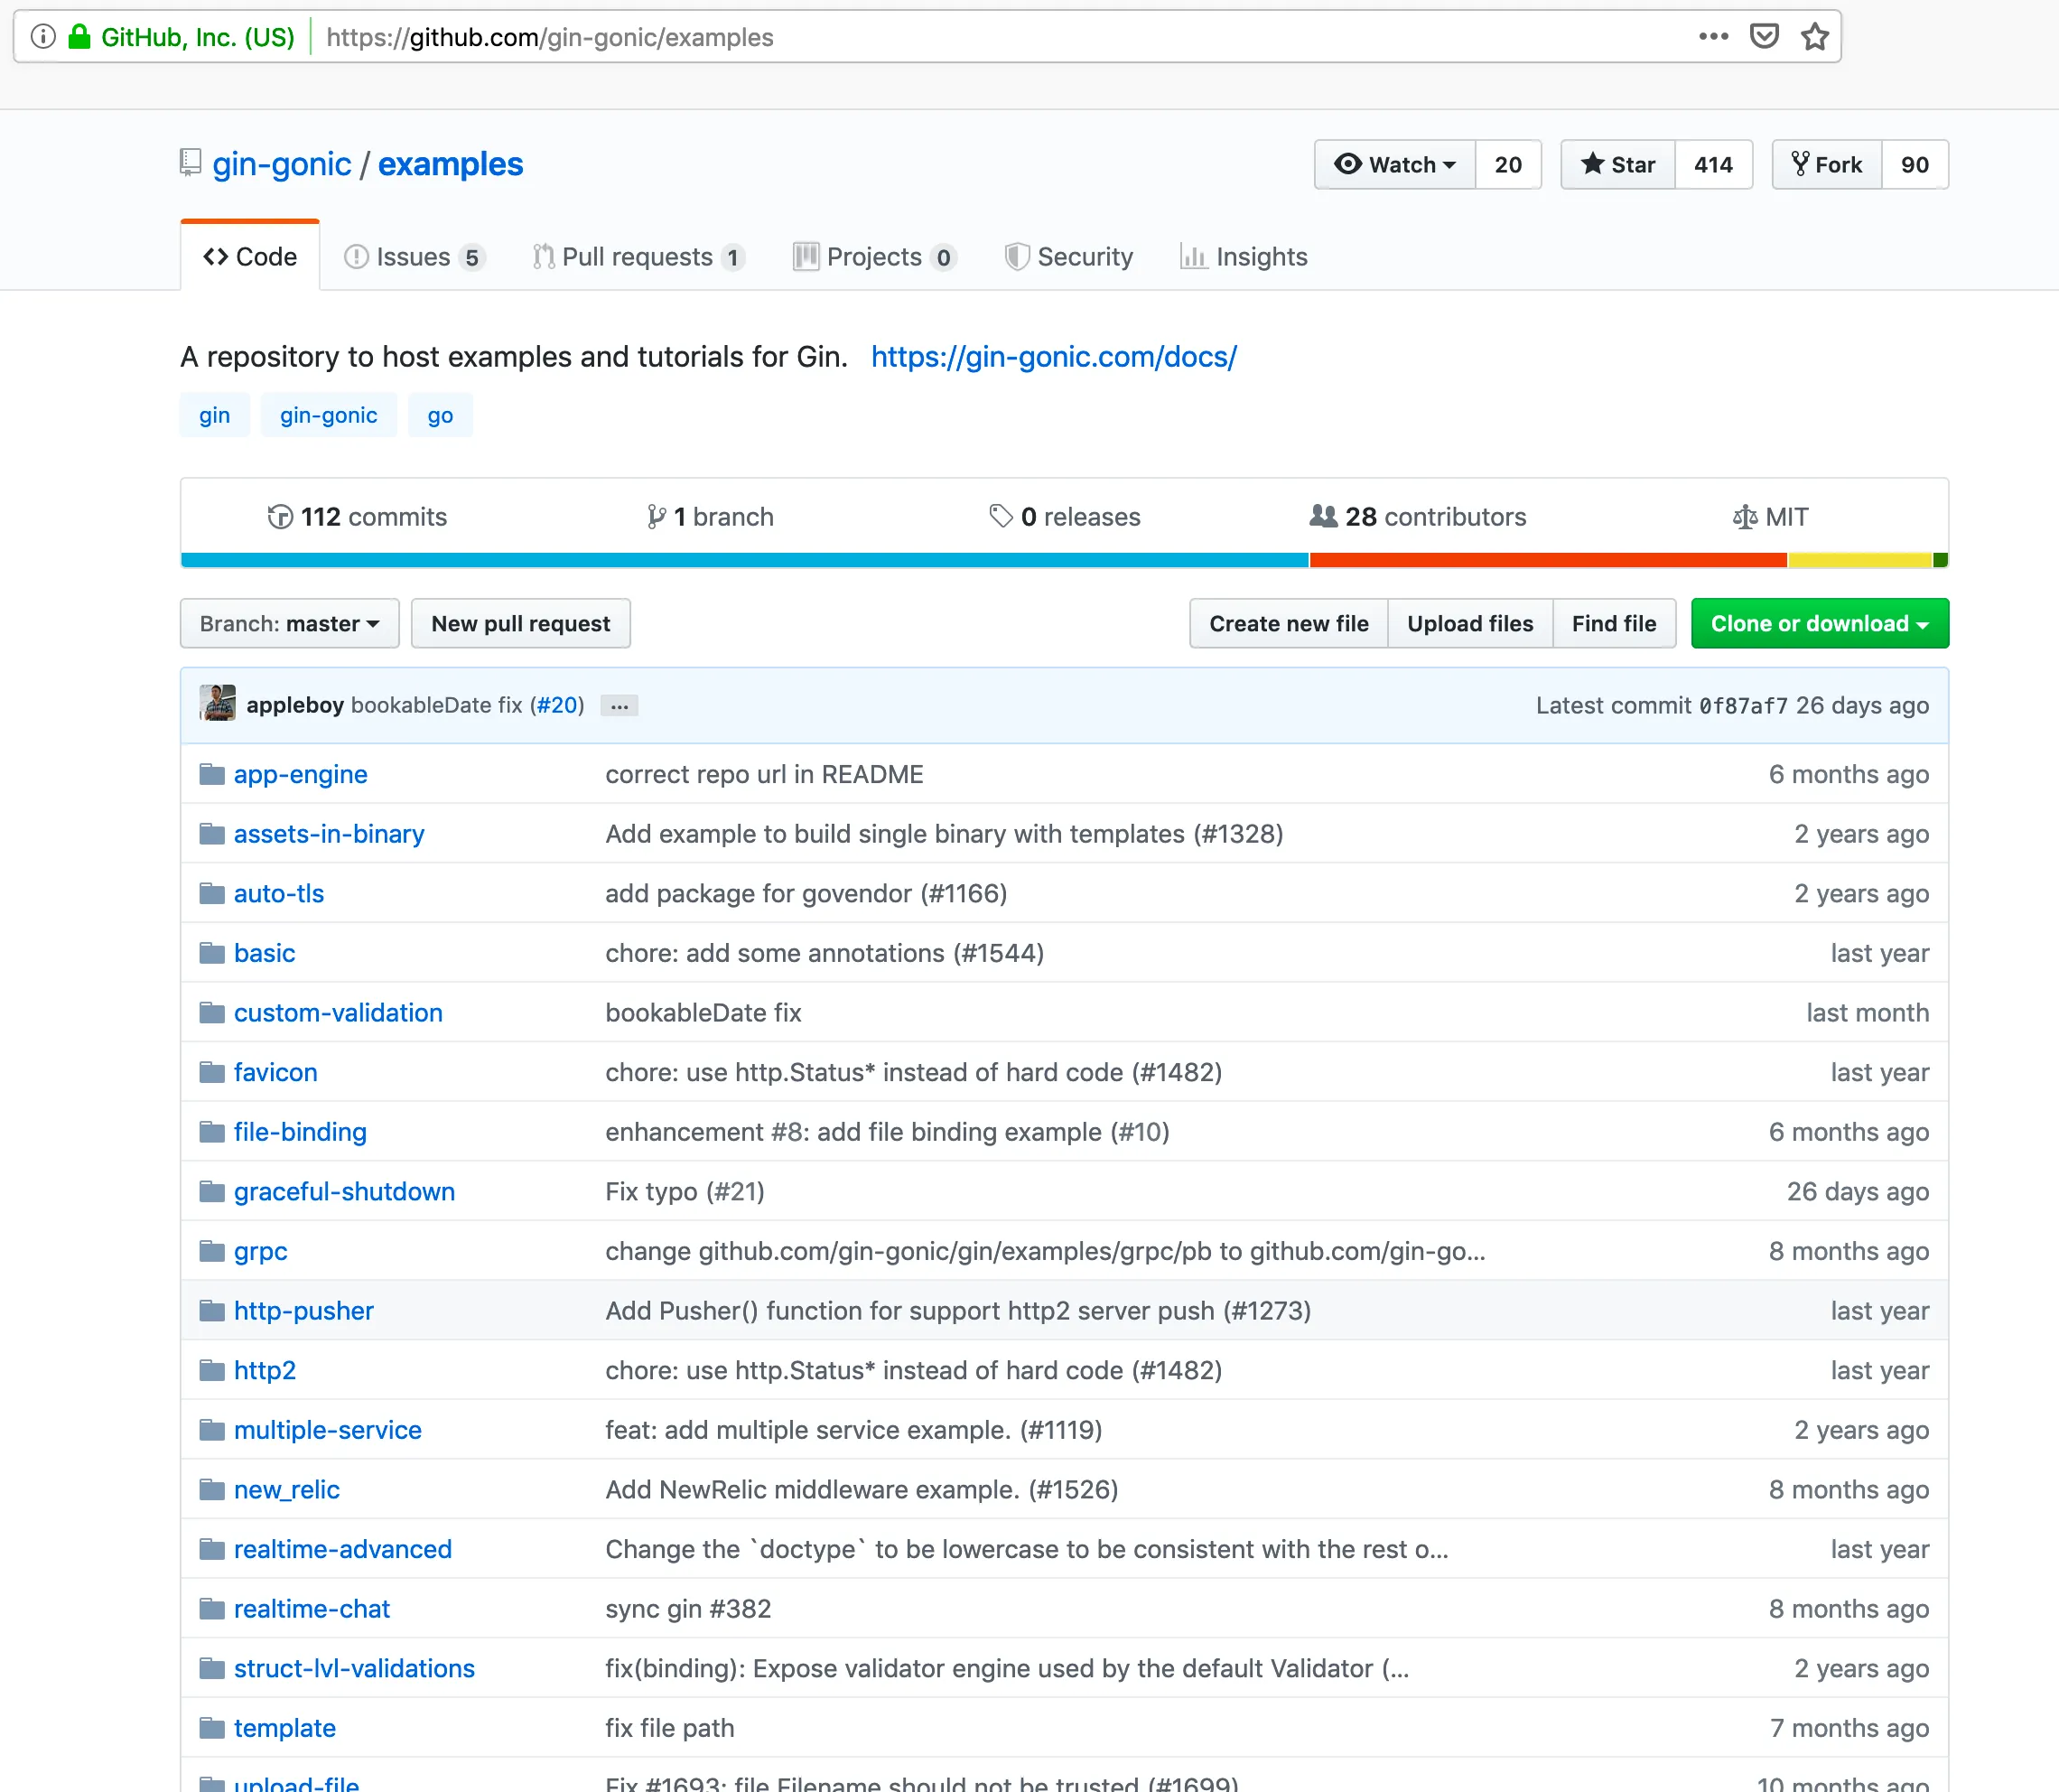
Each folder is a fully working self contained example making use of the Gin library. This allows it’s users to actually see how to integrate the library into their code, as opposed to tutorials, which only deal with specific use cases.
API Documentation
The API documentation contains the description of the individual functions, methods, and components of your library. It is the final source of truth when it comes to deciphering how your library works.
While well-written tutorials and examples cover most of the use cases, you can’t truly cover all of the situations for which people will use your library. Your users will then refer to your API documentation to help them figure it out.
Here are some rules to follow when writing API documentation:
- If a function, class, or variable, is publicly exposed, it needs to be documented.
For example, the Godoc website automatically documents the API structure for all public variables and functions of any Go package.
Here’s what it looks like for theencoding/jsonpackage (Go’s standard JSON library):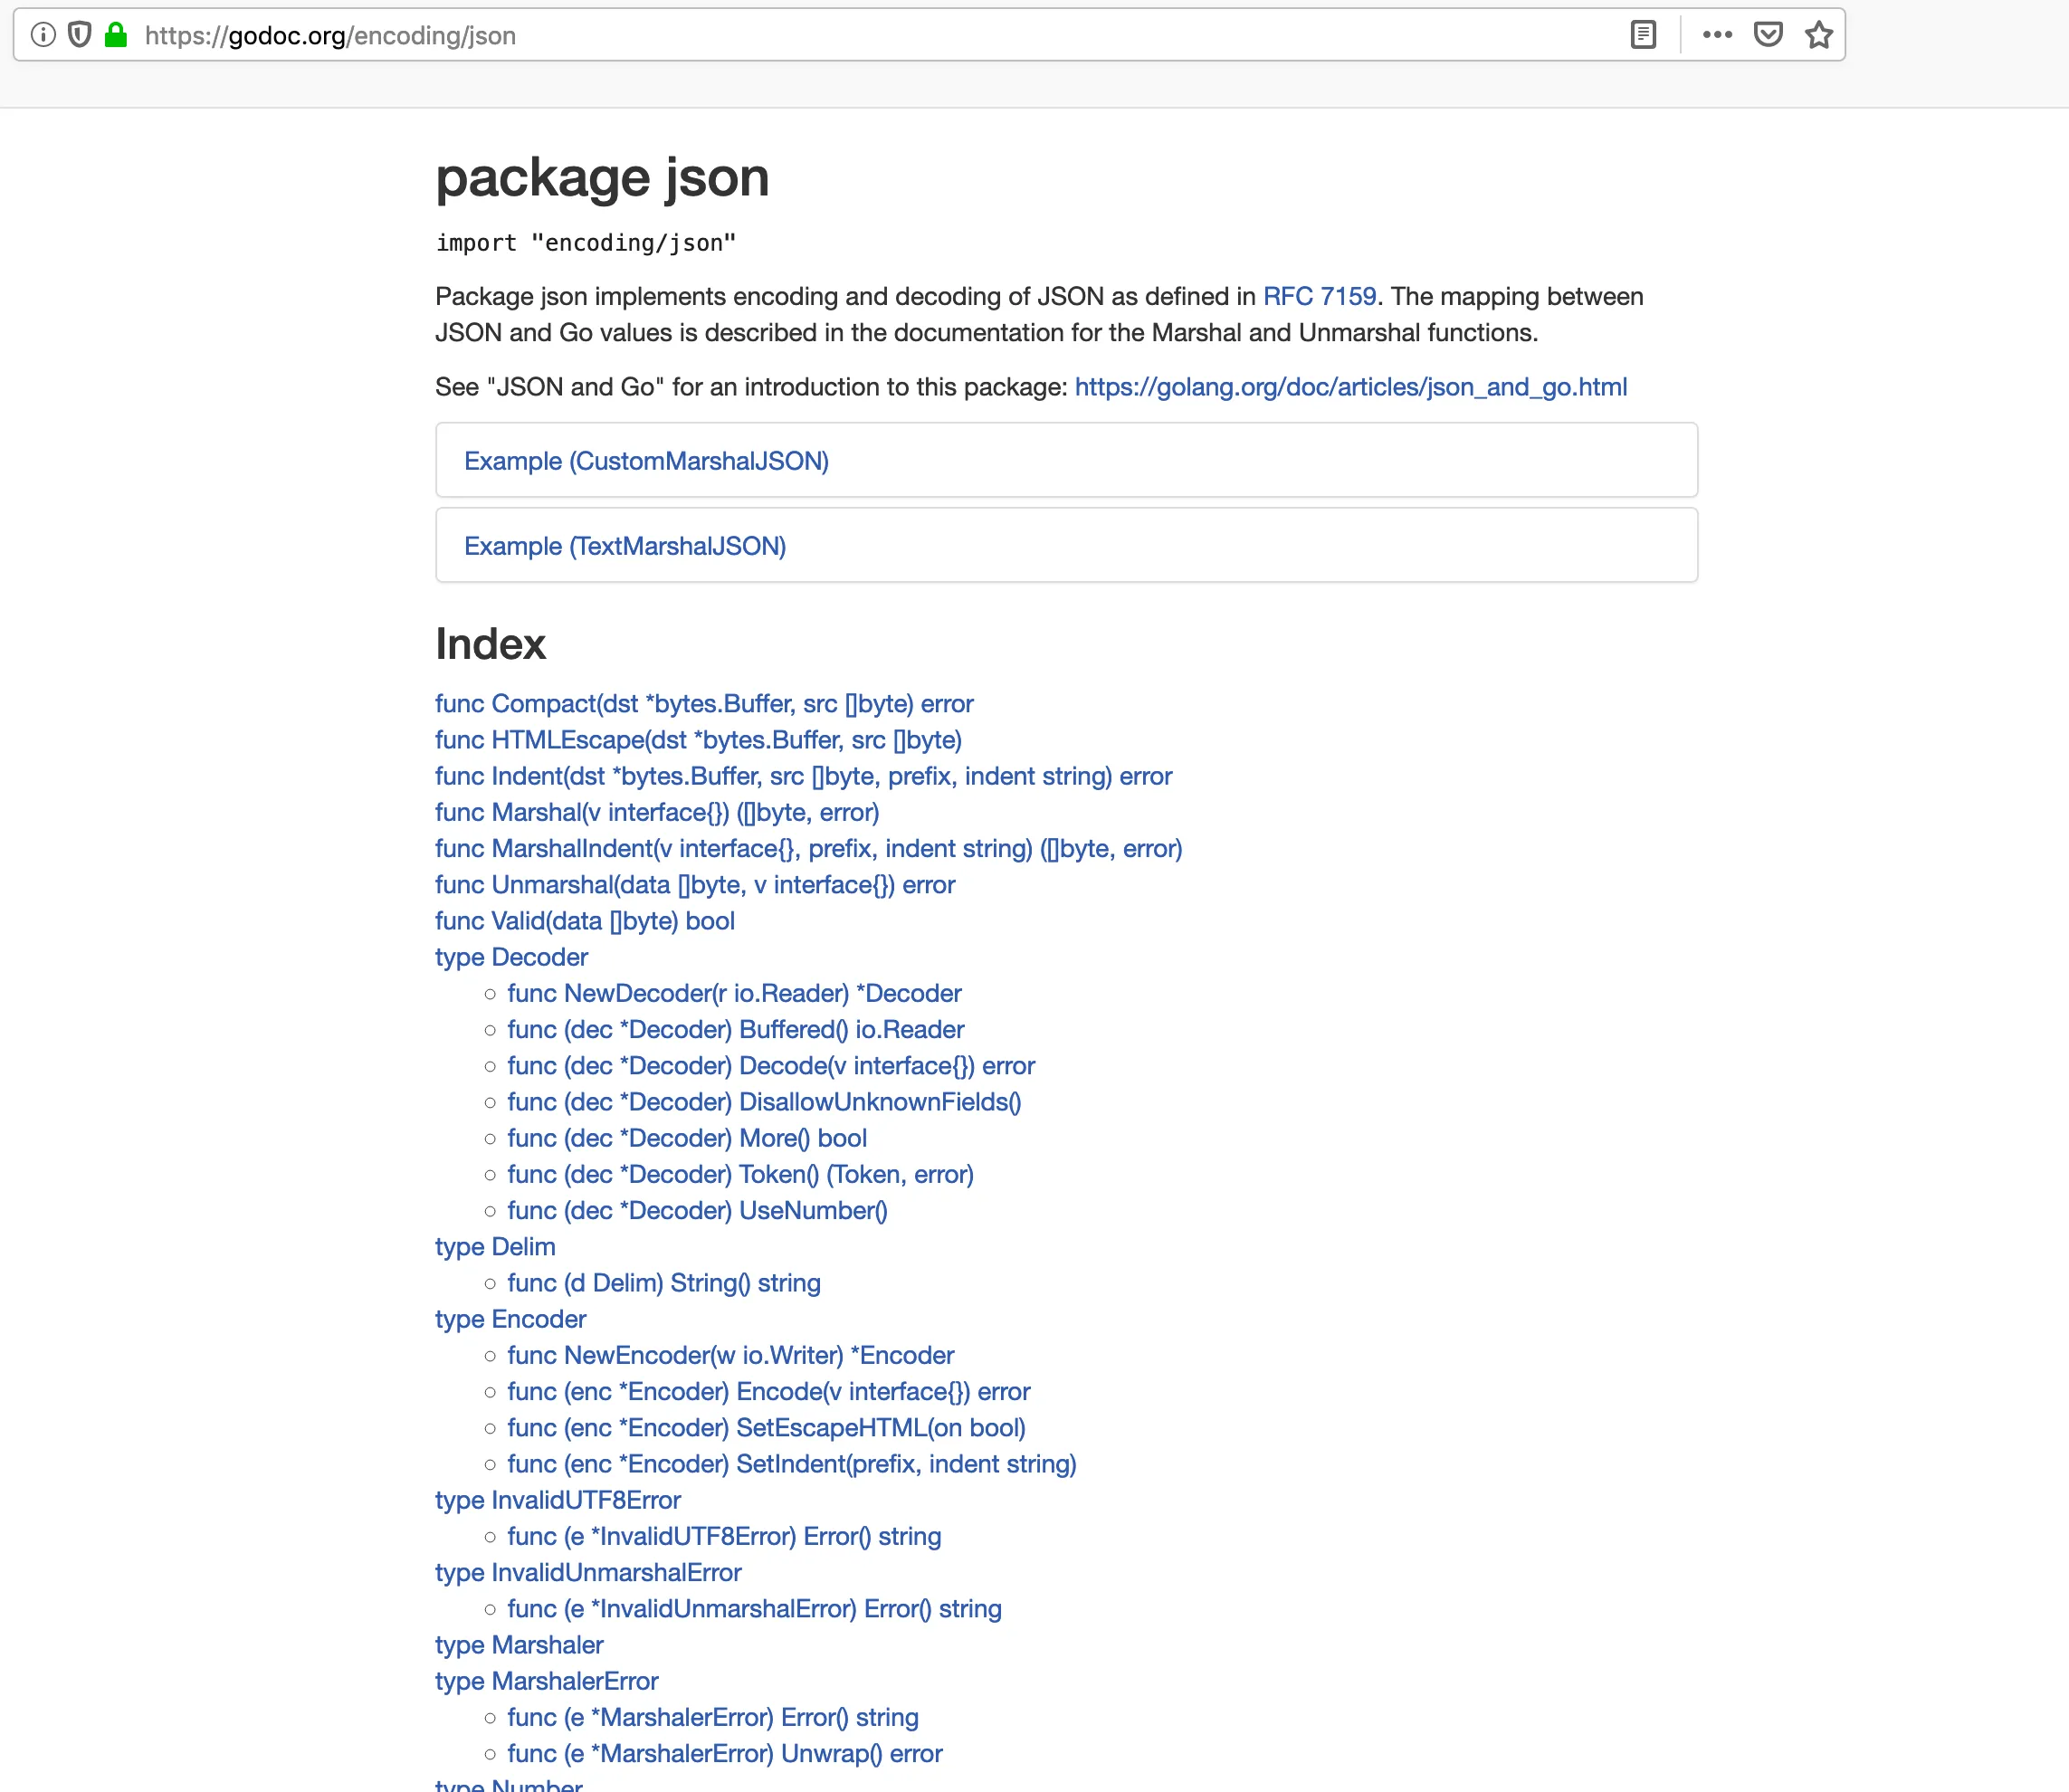
- The documentation should contain a brief description of the component, and mention any edge cases that may occur.
The lodash documentation page for thepadStartfunction clearly mentions what the function does, and its edge case (if the number of padding characters exceed length):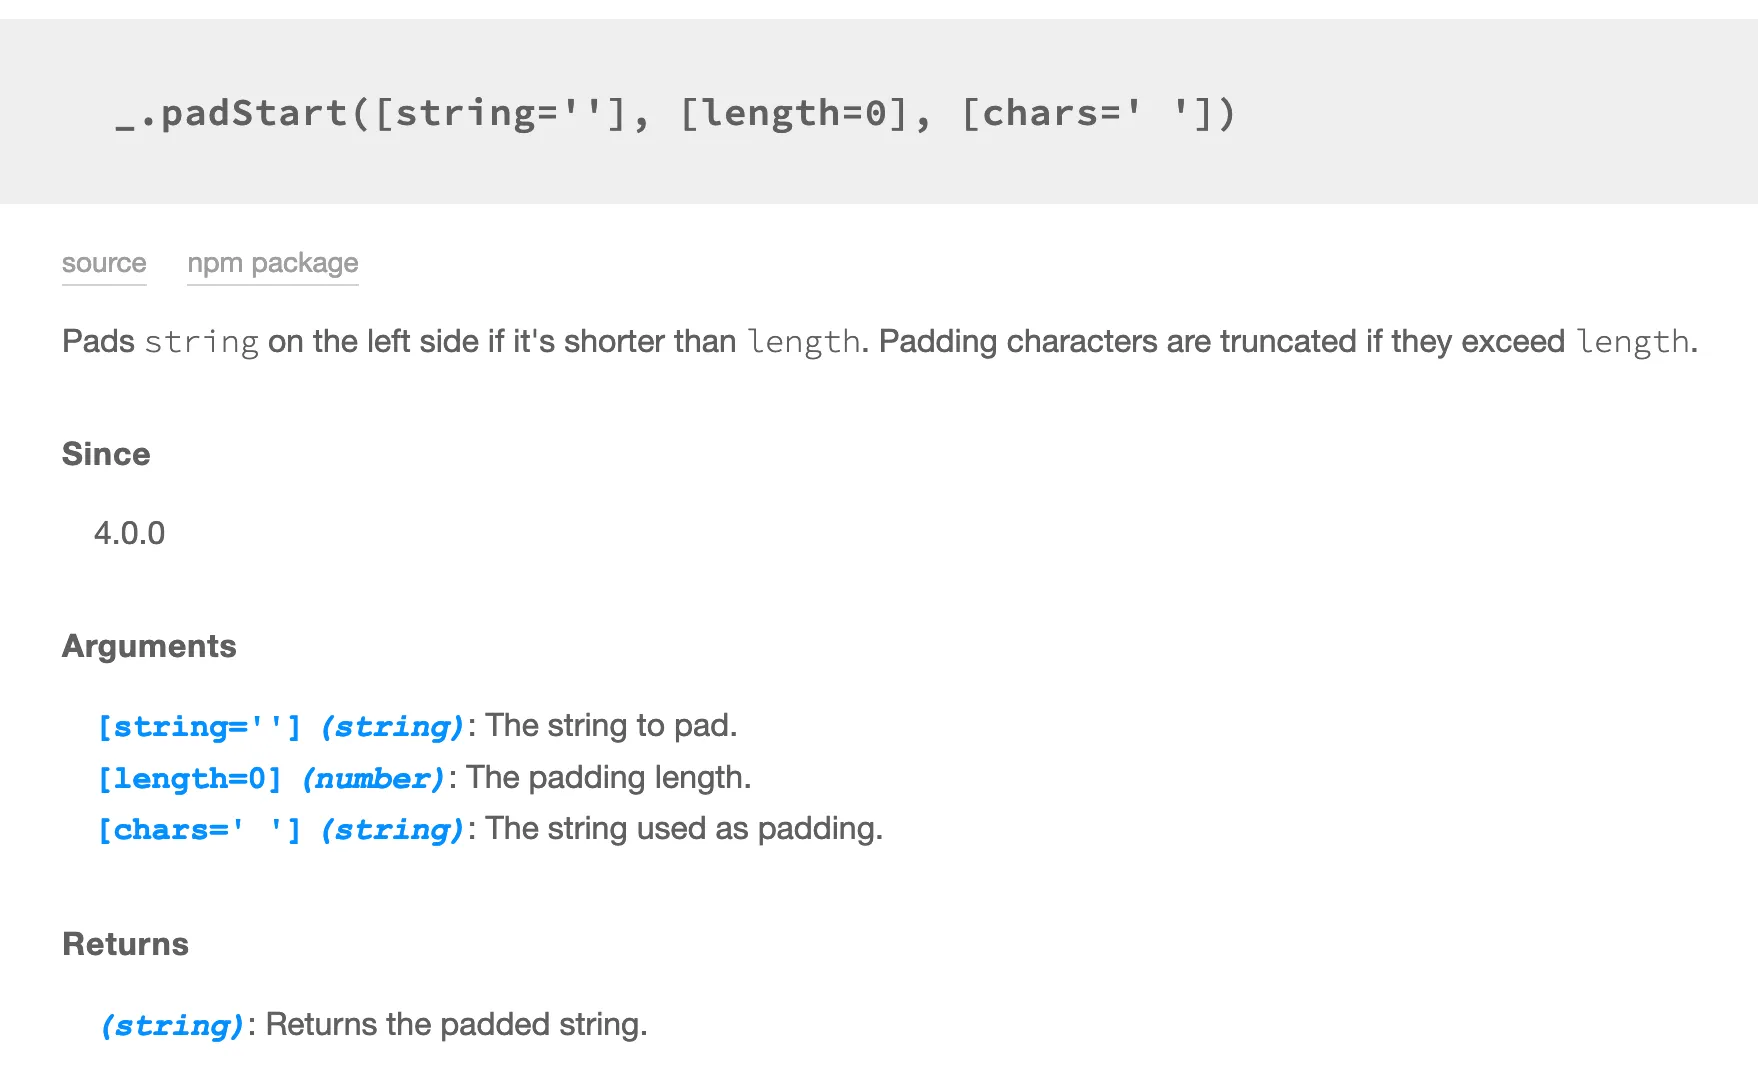
Architecture Documentation
This section of your documentation describes how your code works, as opposed to how to use your code.
While not as important as the previous sections, it’s important if your library requires a certain methodology or way of thinking for users to use it effectively. It also helps contributors, or anyone who wants to delve into the libraries code.
An excellent example of this is React’s Thinking in React documentation page. It describes how one should structure their application and it’s data structure in order to use React in the best way possible.
You should only add architecture documentation if your library is complex enough to require it. For most cases, well documented tutorials, examples and APIs are sufficient.
How Do You Know if Your Documentation Is “Good”?
Ok, so you’ve read all these tips on writing good documentation, but is there really any objective way to measure how good your documentation actually is?
Well, the answer is yes: Feedback!
Feedback is one of the most effective acid tests to determine if your documentation can be understood by others.
You can get feedback by asking your friends or colleagues to try and use your library by only reading the documentation. The areas where they face difficulty in understanding how to use the library are the areas for which you need more documentation.
Once you know that others can use your library effectively with the help of your documentation, you can be sure that it’s actually good.
Of course, feedback is a continuous process: you should monitor the troubles your users face (either through filing issues or personal feedback) and modify your documentation accordingly.
Was this article helpful? Do you have any other tips on how you made your documentation better? Let me know in the comments!